TUTORIAL STREAMING SCHEDULER This page was translated by Google
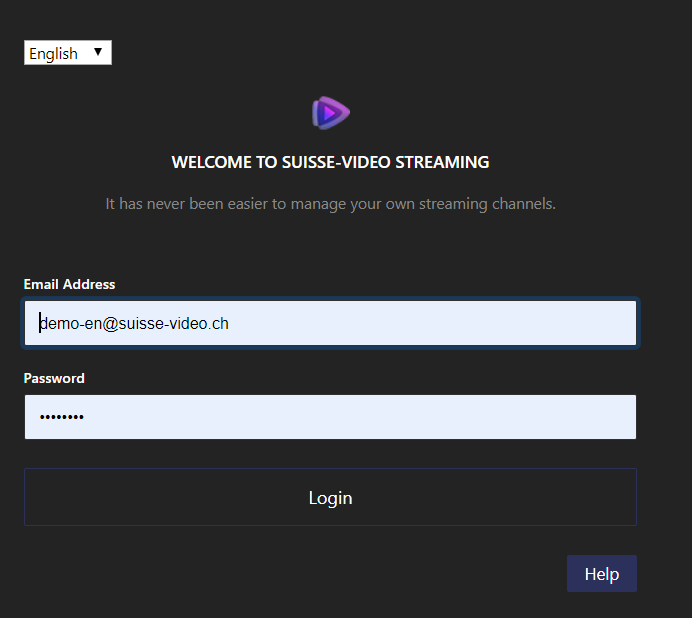
Application login
To use our streaming application, you need account to login. If you don’t have account credentials so please contact us: support@suissse-video.ch If you have account credentials, please go to: https://istream.iradweb.de and login in to the application.
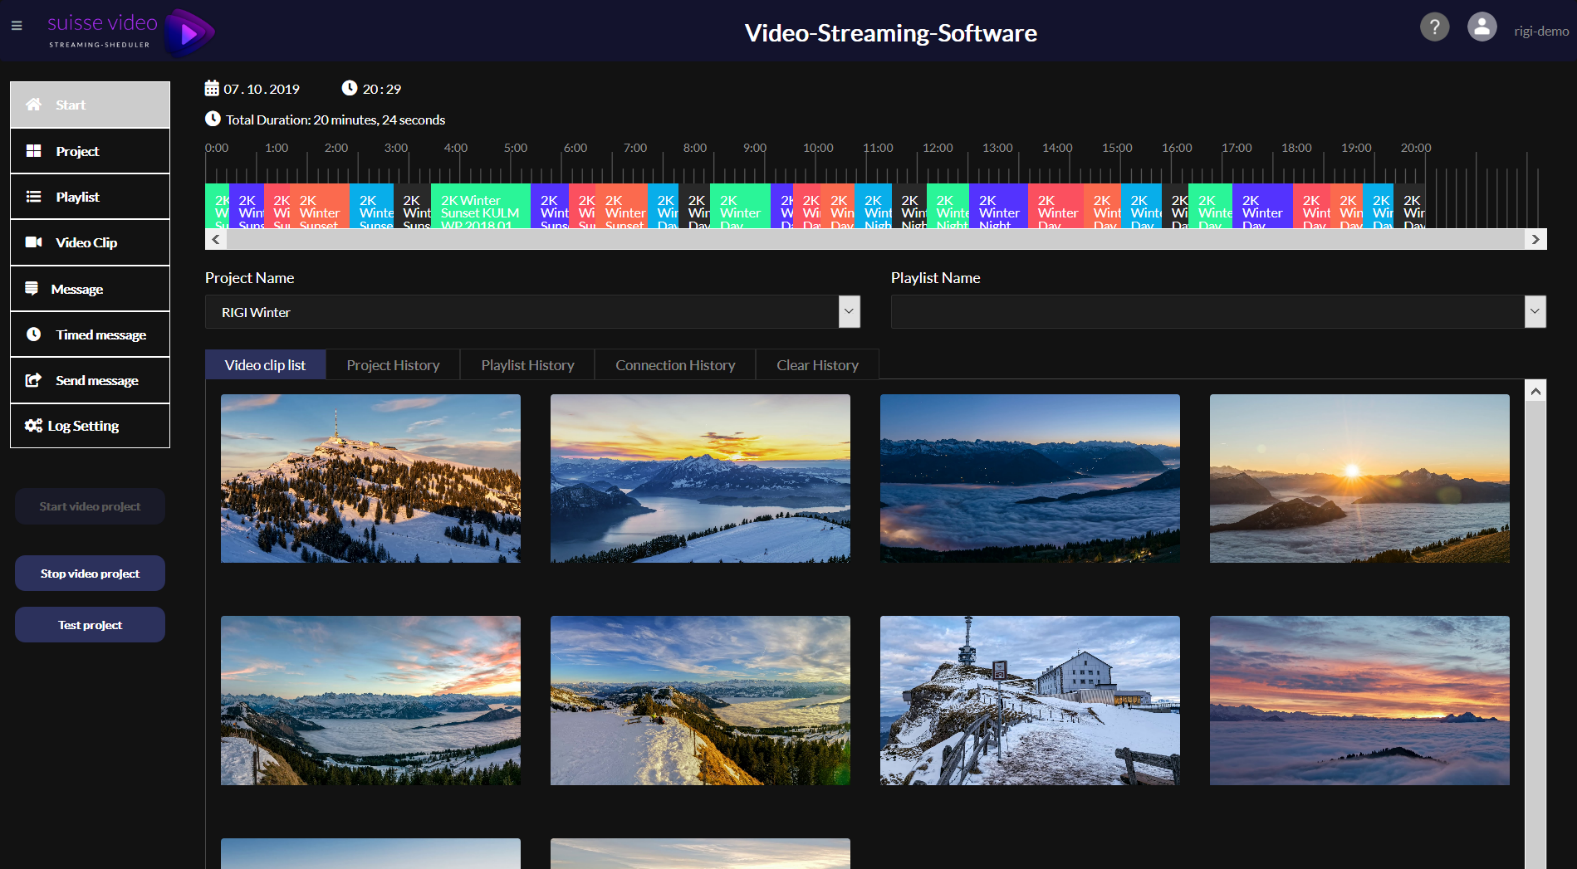
Application Start screen
once you login, you get following screen:
From here you can access all functions our streaming application:
- Project
: create and manage your projects
- Playlist:
create and manage your playlist
- Video Clip:
create and manage your playlist
- Messages:
create and manage your messages
- Timed messages:
create and manage your timed messages
- Send message:
send live message to your selected project
- Log Settings:
define what kind of connection monitoring you like to activate
- Start video project:
start your selected project
- Stop video project:
stop your selected project
- Test video project:
start your selected project locally for testing
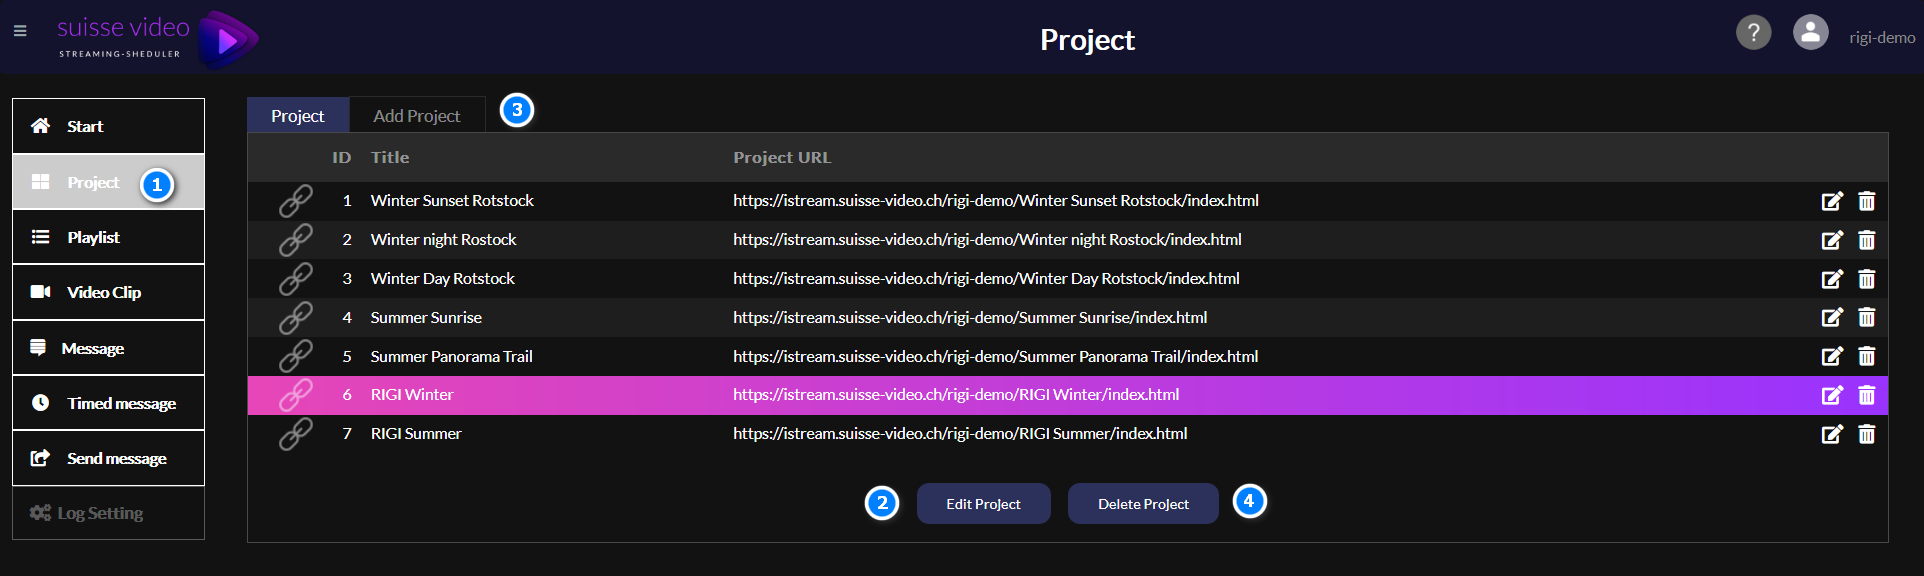
Menu Project
#1- select here to open the project page #2- click here to edit existing project parameter #3- to create new project click on the TAB “Add Project” #4- remove the selected project
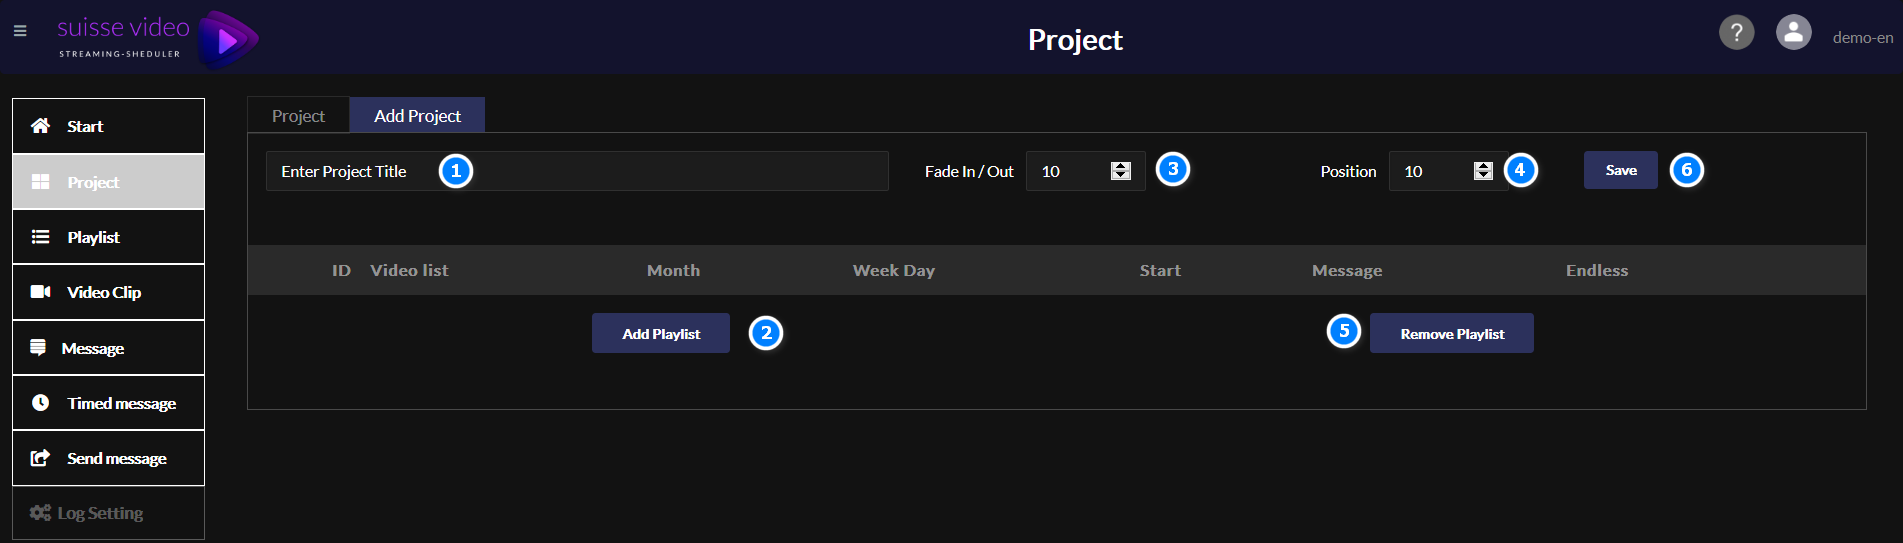
Add Project
#1- enter here your project title #2- add your predefine playlist to your project #3- use this fade IN/OUT function to make your video clip transition softer #4- set the start position in your project clip #5- remove your project include all project settings
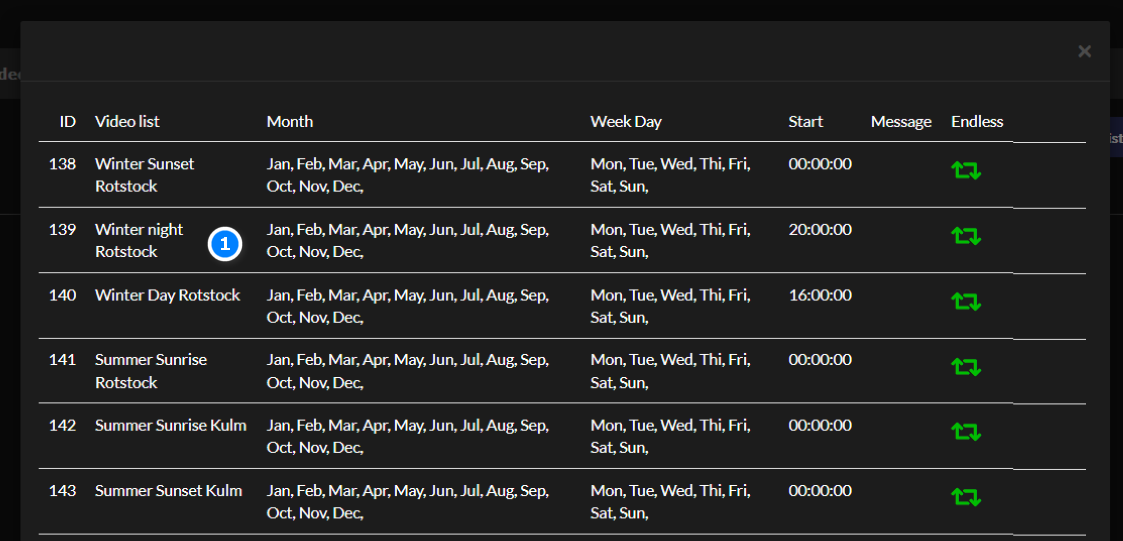
Add playlist to your project
To add playlist to your project, simply on one of the displayed video playlists entry. This will be added to yours previews selected project. You can repeat these steps for all other playlist you want to add.
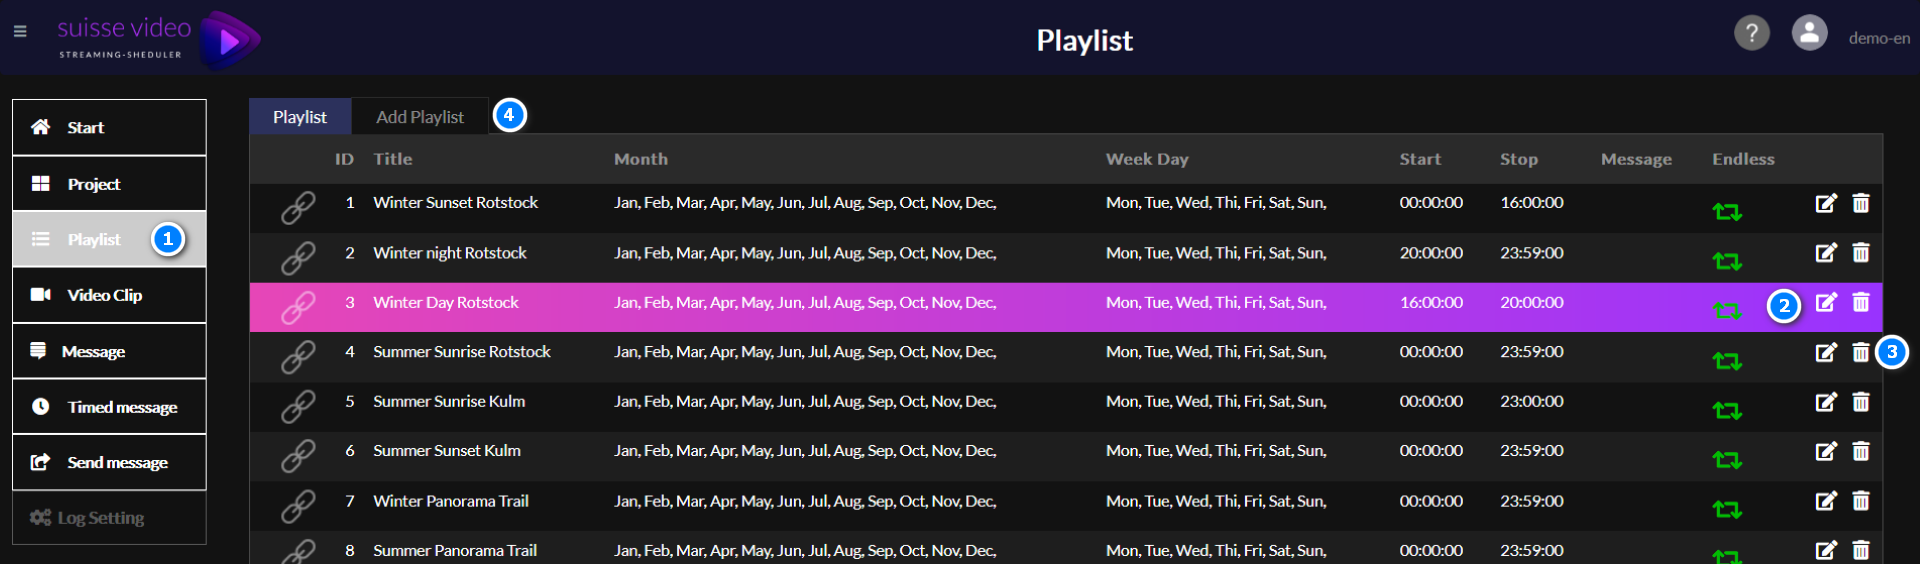
Menu Playlist
On this place you can see all your created playlists. From here you can: create, edit, delete your playlists.
#1- select here to open the playlist page #2- click here to edit existing playlist #3- remove the selected project #4- to create new playlist click on the TAB “Add Playlist”
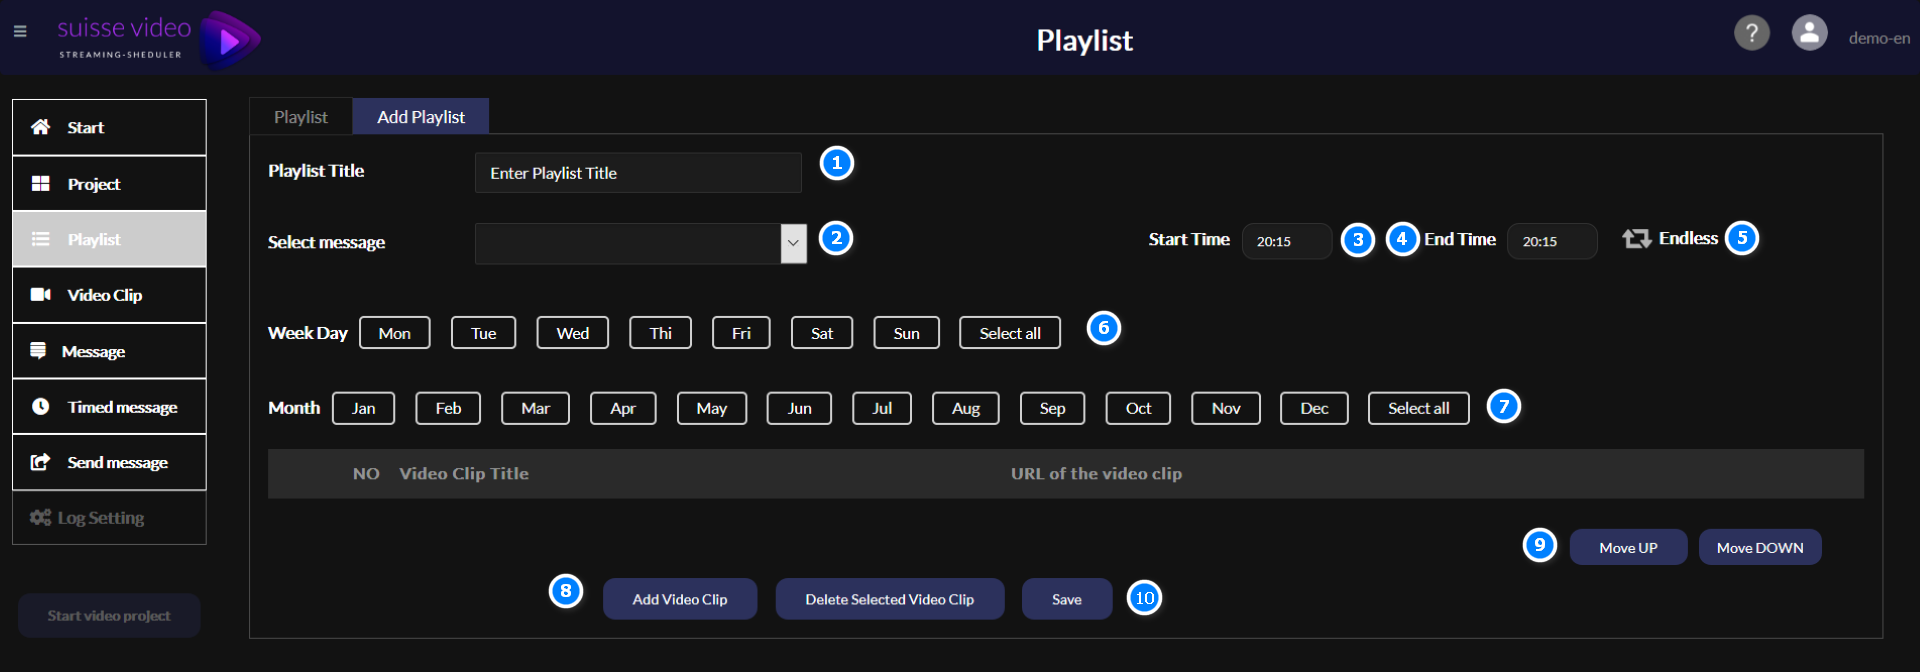
Create Playlist
#1- enter the playlist name here #2- optionally you can add a scrolling message to your playlist #3- set the star time for your playlist #4- set the end time for your playlist #5- determine the playing time of the playlist #6- determine the playing date #7- determine the playing month #8- add videoclip to your playlist #9- change the clip order in your playlist #10- don’t forget to save your changes!
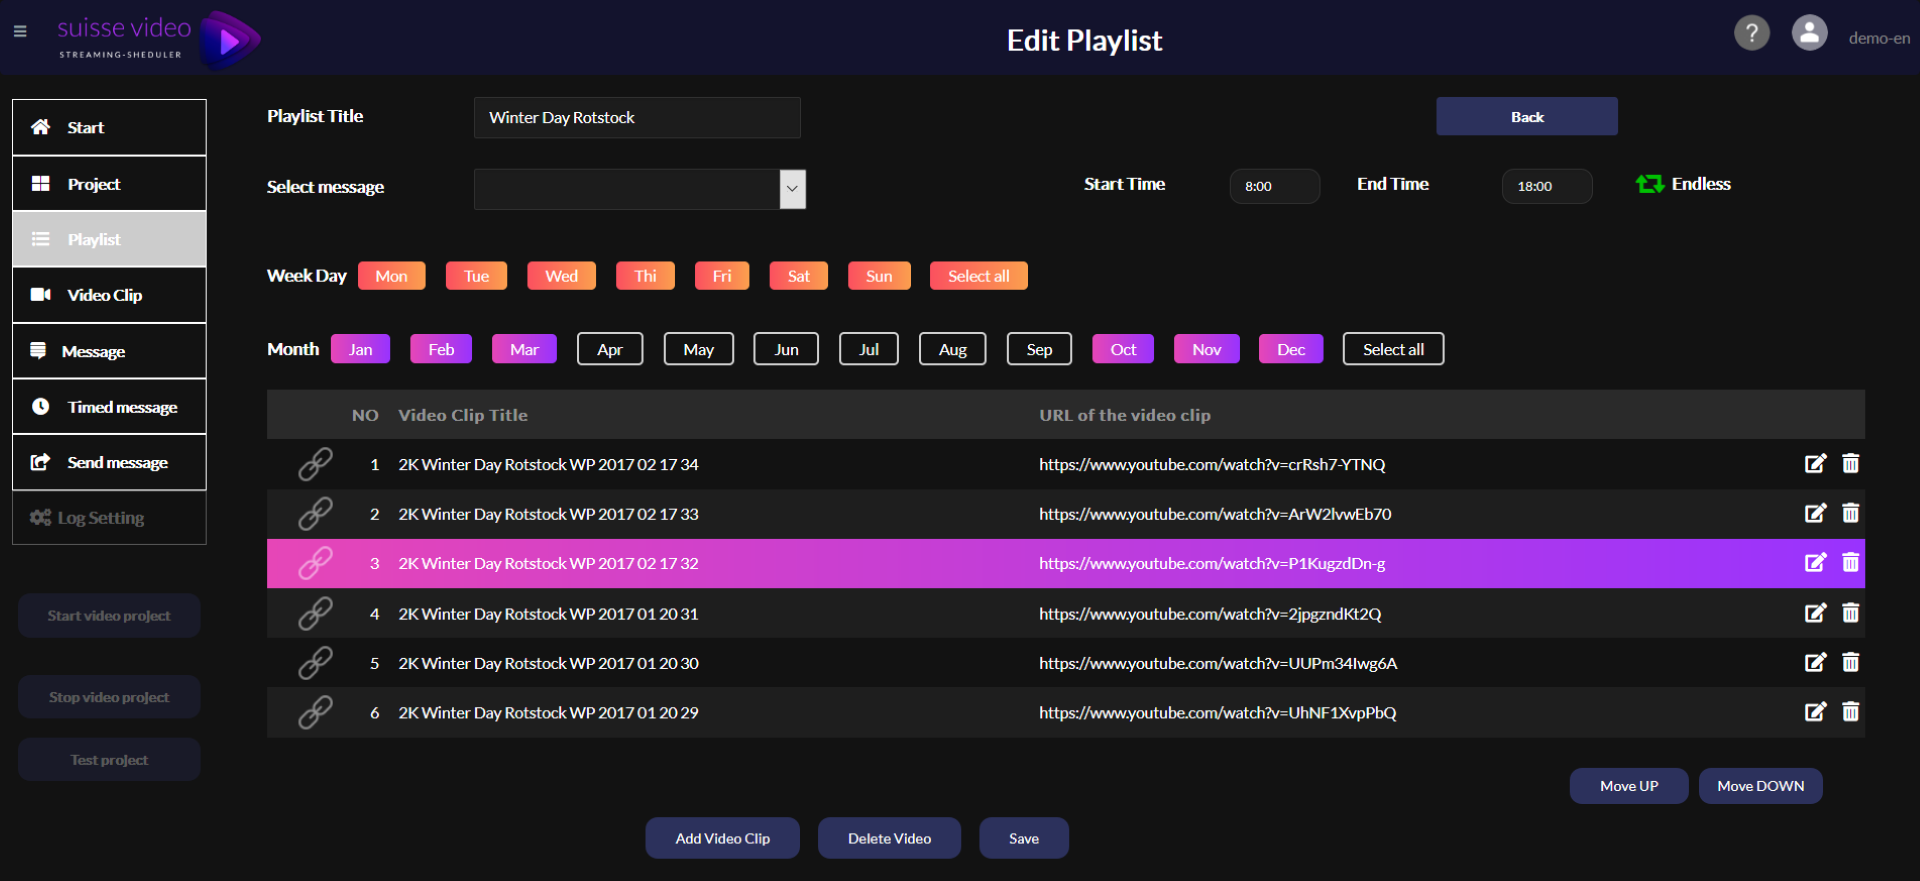
Playlist example
In this example you can see selection for the whole week days and winter month.
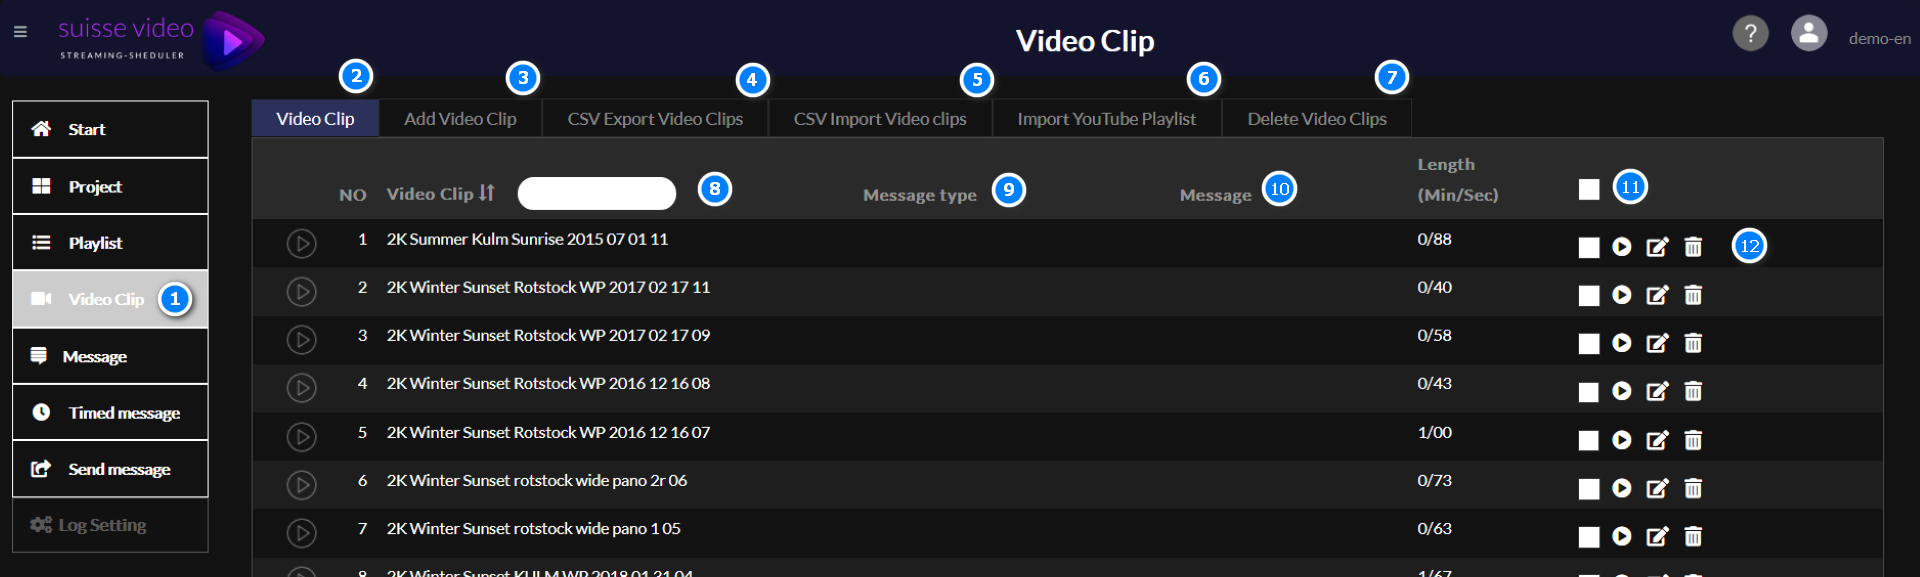
#1- select here to open the video clip page #2- click here to see your imported video clip links #3- add new single video clip #4- export your playlist to CSV file. You can use this function to make a backup for your clip list or simply to modify the names in your Excel application. Important: you can’t change the structure for this file, otherwise your import can’t work or you can get some unexpected problems in your projects. #5- import the previously exported CSV file #6- you can import your YouTube playlists one by one #7- remove all your video links from your video list #8- sort or set filter for the video clip names #9- show you the message type if you define scrolling message for each video #10- show you the message content #11- select all video clips #12- mark, preview, edit and remove selected video clip
Add video clip
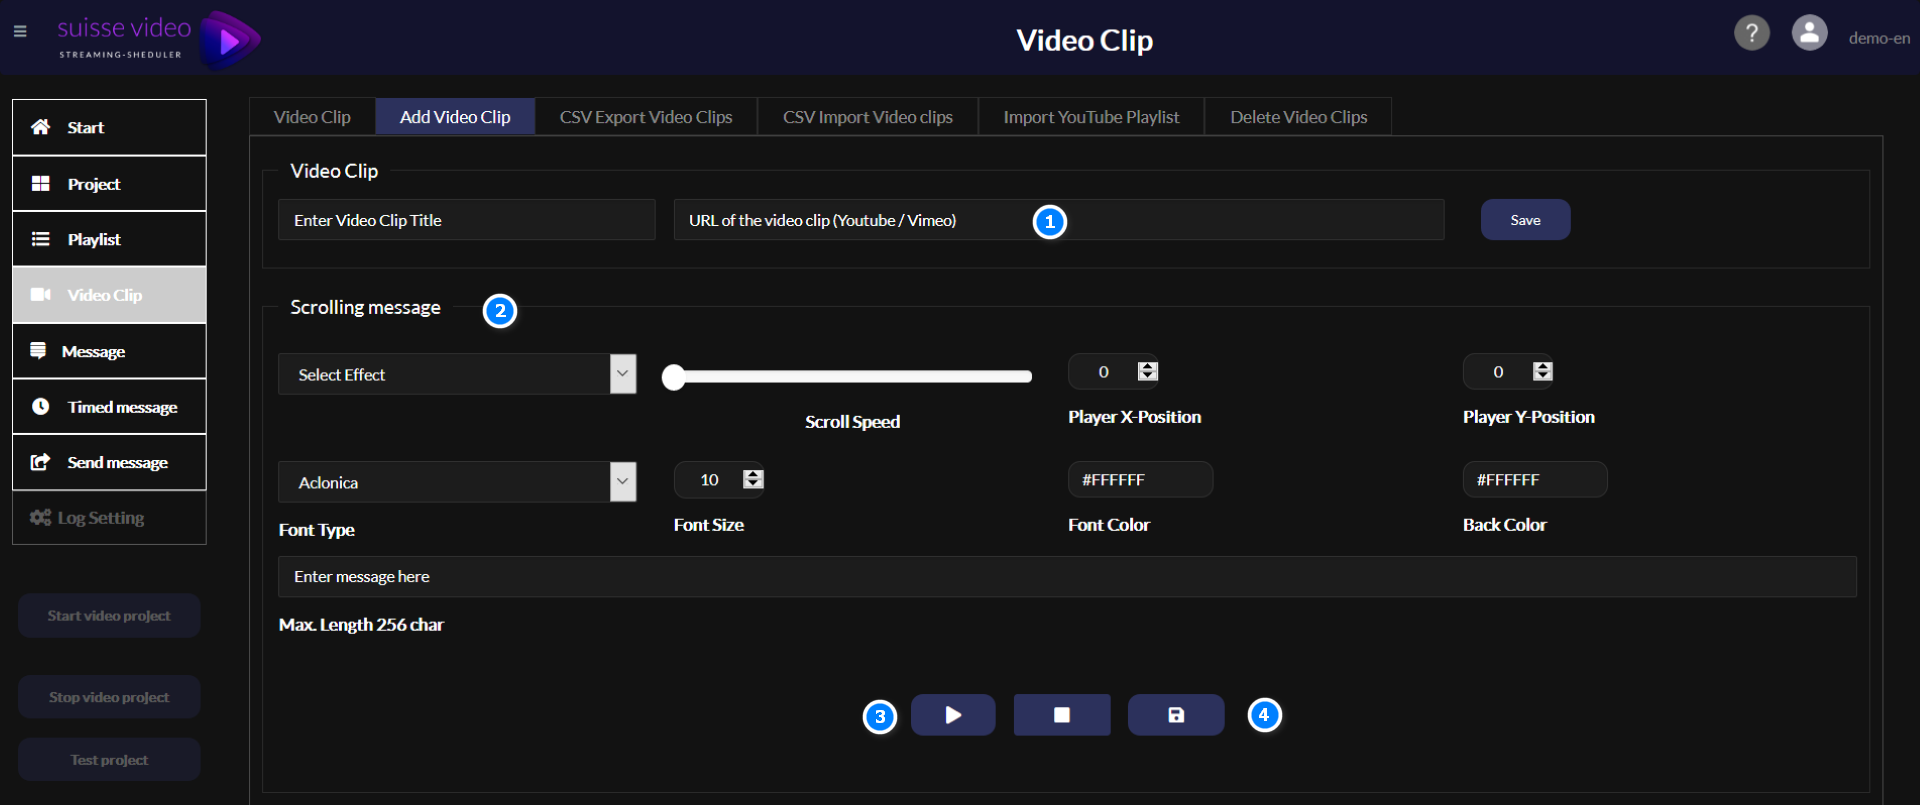
#1- enter here your clip URL #2- optionally you can define a message to each video clip separately #3- preview your video clip #4- finally don’t forget to save!
CSV Export video clips
To export your video clips use the button “CSV Export Video Clips”
CSV Import video clips
To import your video clips use the button “CSV Import Video Clips”
Import YouTube Playlist
To delete your video clips use the button “Delete Video Clips”
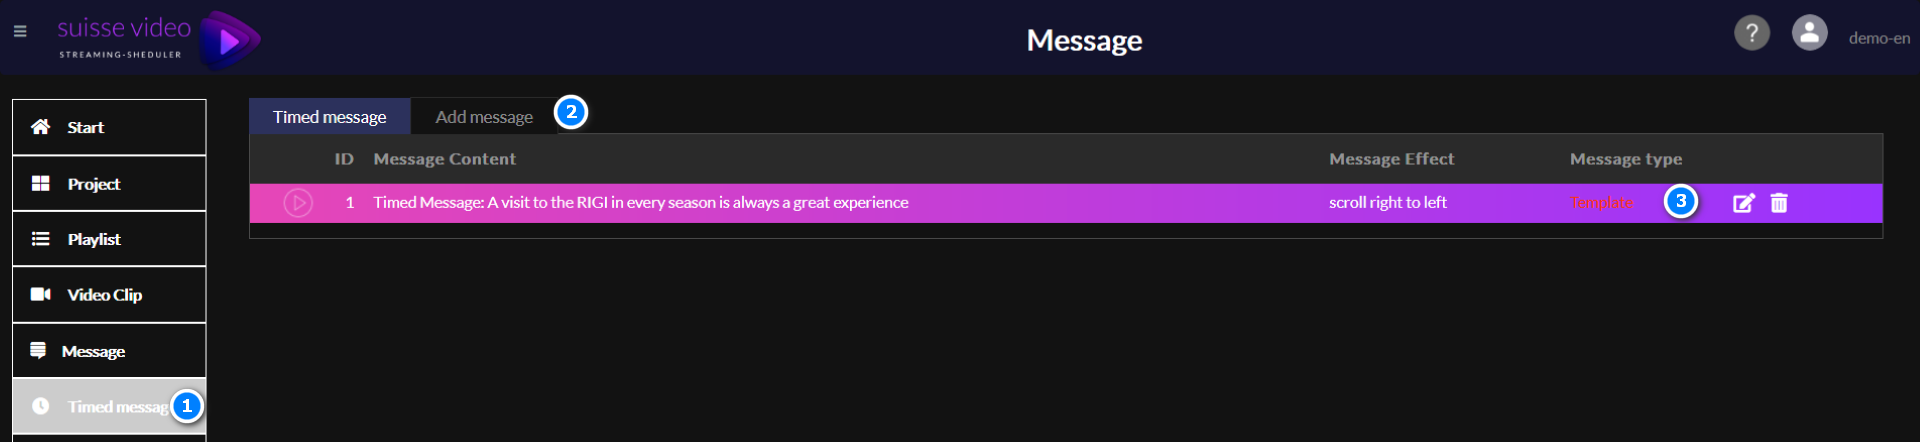
Menu Messages
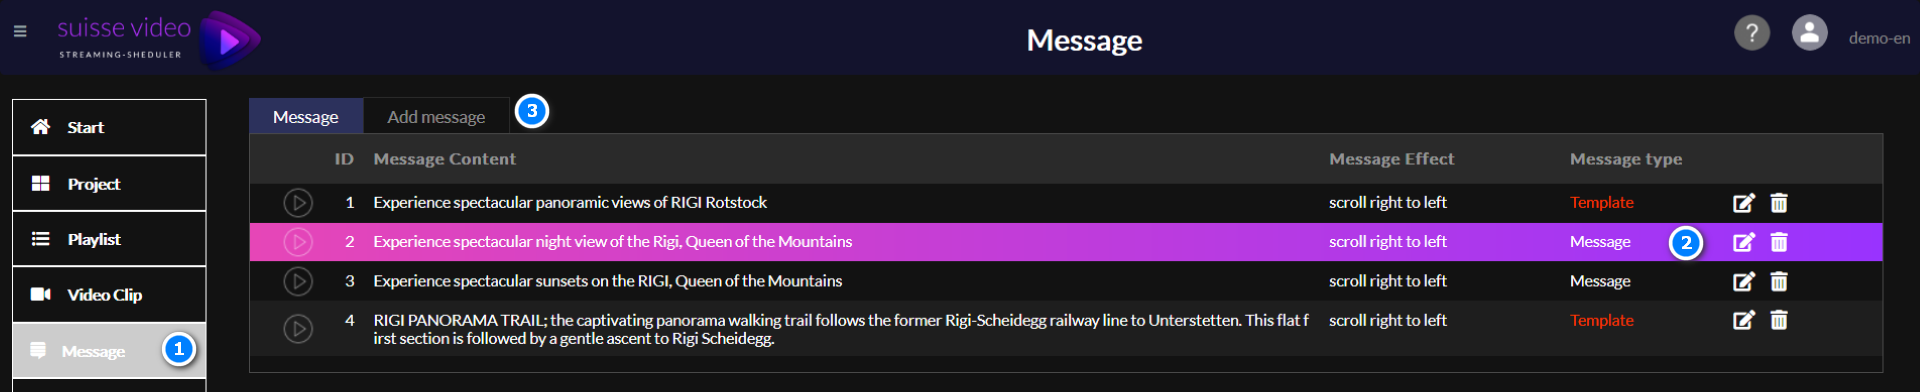
#1- click here to show your message list #2- click here on the selected line to edit your existing message #3- click here to add new message
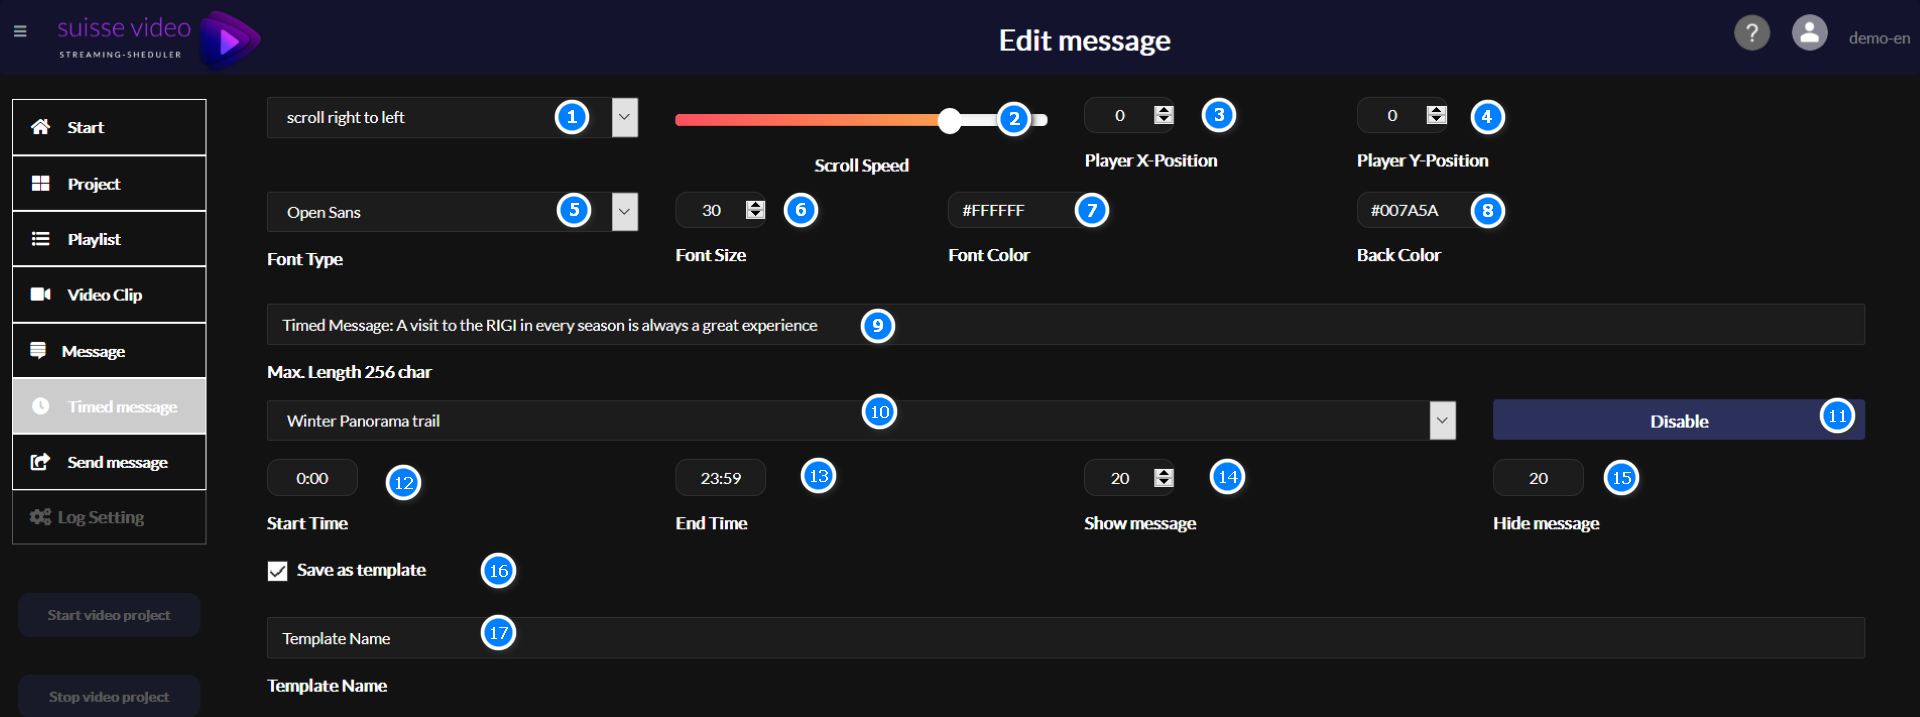
Edit message
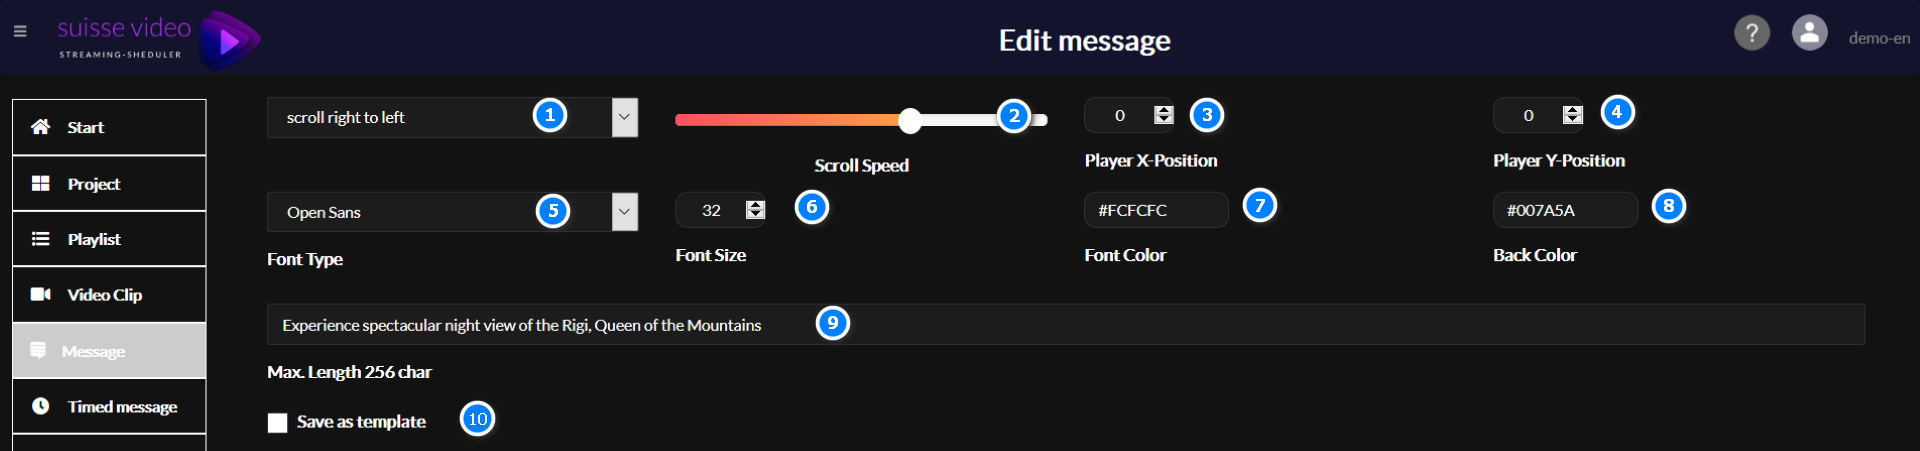
#1- select scroll direction #2- select scroll direction #3- click here to adjust horizontal position (normally no need) #4- click here to adjust vertical position (normally no need) #5- select your message font style #6- select your message font size #7- define your font color #8- define your message background color. You also can define transparency for your background. #9- enter your message here #10- save this message as template, you can use this later for your live messages.
#1- click here to show your live message list #2- click here on the selected line to edit your existing live message #3- click here to add new live message
Timed Messages
Example
#1- select scroll direction #2- select scroll direction #3- click here to adjust horizontal position (normally no need) #4- click here to adjust vertical position (normally no need) #5- select your message font style #6- select your message font size #7- define your font color #8- define your message background color. You also can define transparency for your background. #9- enter your message here #10- select your project to use this live message #11- disable your active live message #12- enter the starting time here #13- enter the ending time here #14-15 If you use alternating message, you can define the time in second to show and hide this message. #15- If you use alternating message, you can define the time in second to hide this message. #16- save this message as template, you can use this later for your live messages. #17- enter the template name here if you like to store as template
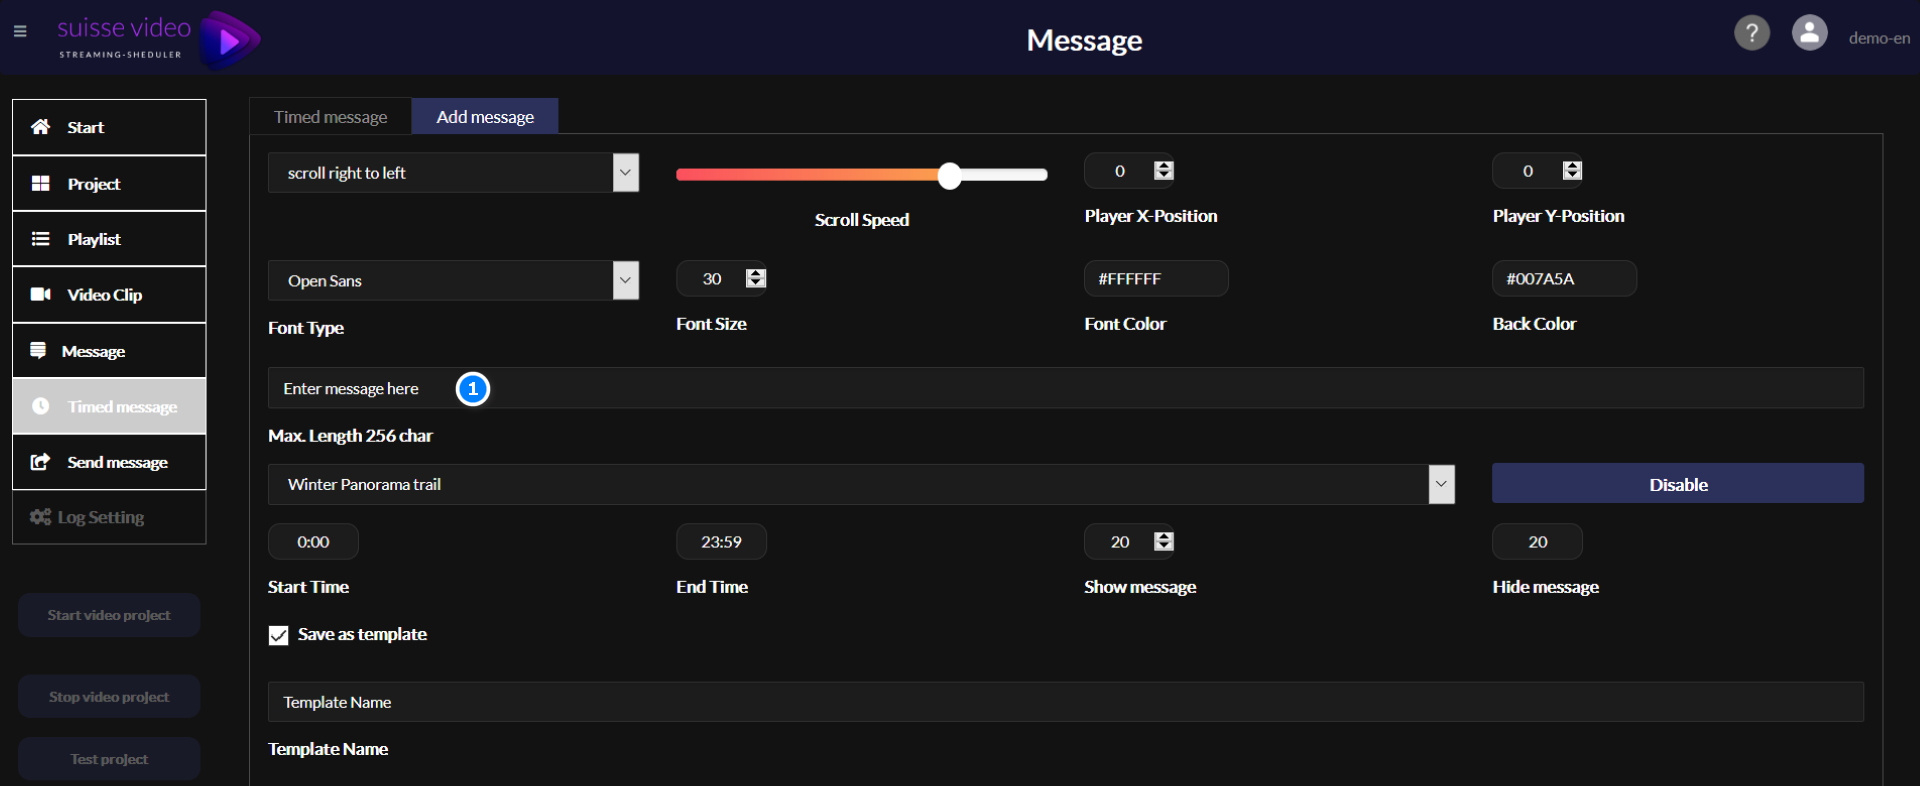
Add new timed message
#1: enter here your message text and set all other parameter as in example before
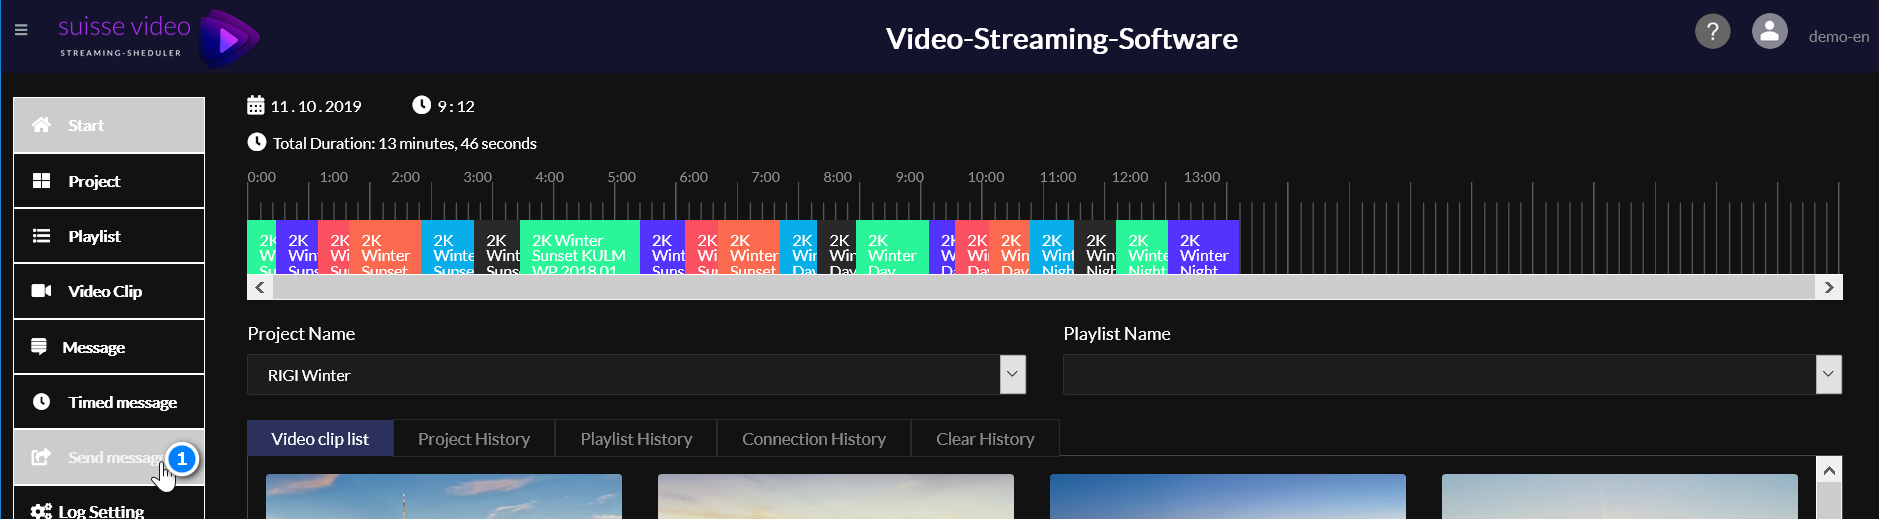
Menu Send Messages
#1- click here to show the send message dialog
Dialog
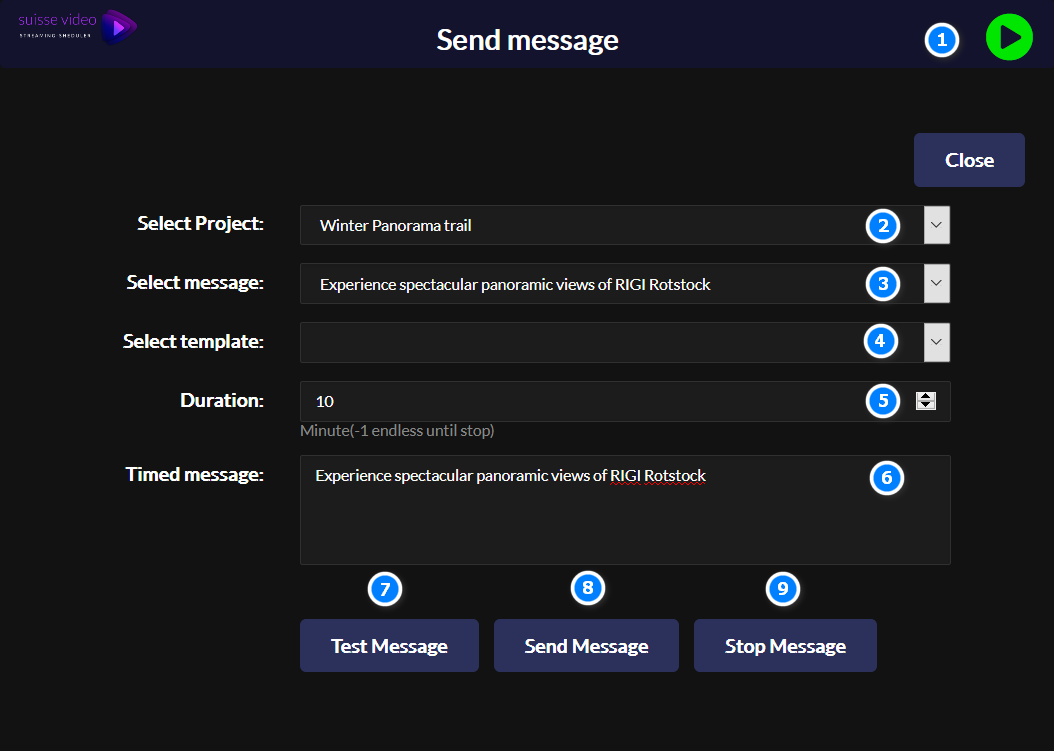
Send message
#1- green light showing you selected project is active #2- select your project to send live message #3- select your saved messages for sending (no need if you use template) #4- select your template for sending live message (no need if you use defined messages) #5- define your message duration time (-1 means message will be shown until you stop the message) #6- enter or modify your message content here #7- test message in separate project window #8- send message to your selected project #9- stop the active message in selected project
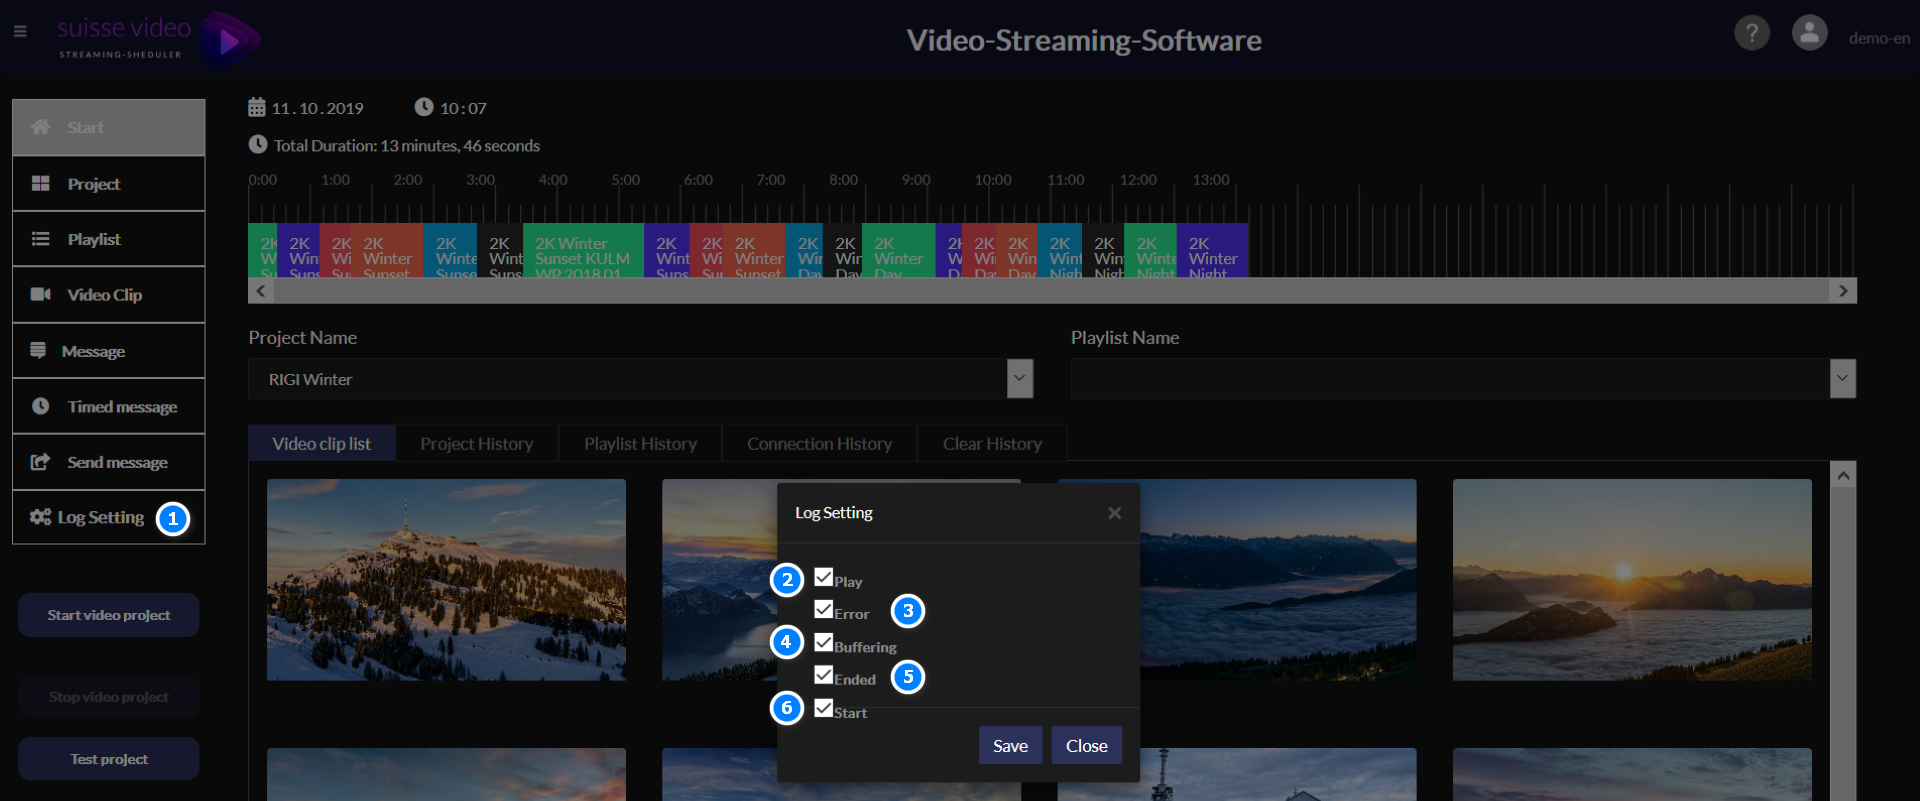
Menu Log Settings
#1- Open the settings dialog
#2- monitor the play status from your connected client player
#3- monitor the error status from your connected client player #4- monitor the buffering status from your connected client player #5- monitor the ending status from your connected client player #6- monitor the start status from your connected client player
! This parameter can be used in case of troubles. Normally you don’t need to activate all this parameter.
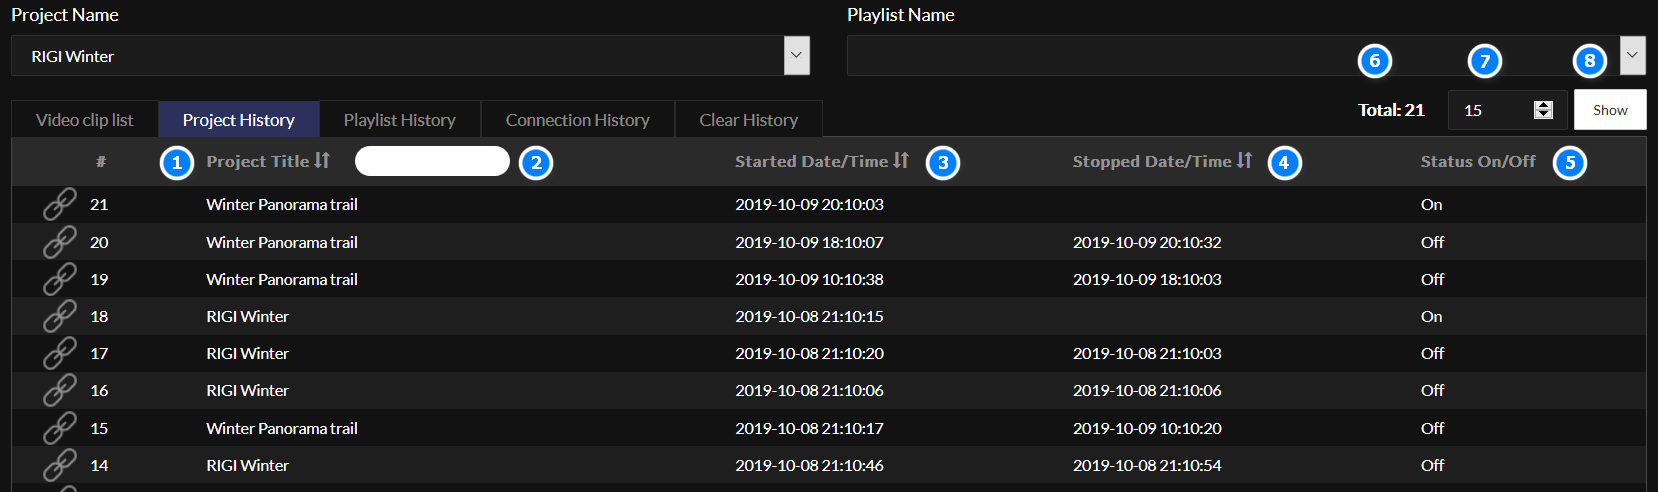
Monitoring: project
history
# 1- Click here to sort this list by your project name # 2- Enter the project name to activate the filter for your project name # 3- Sort this list by start date / time # 4 - Sort this list by stop date and time # 5- sort this list on on / off status # 6 Total number of records for this selected project # 7- Select the area for displaying records # 8- Update the content in your list
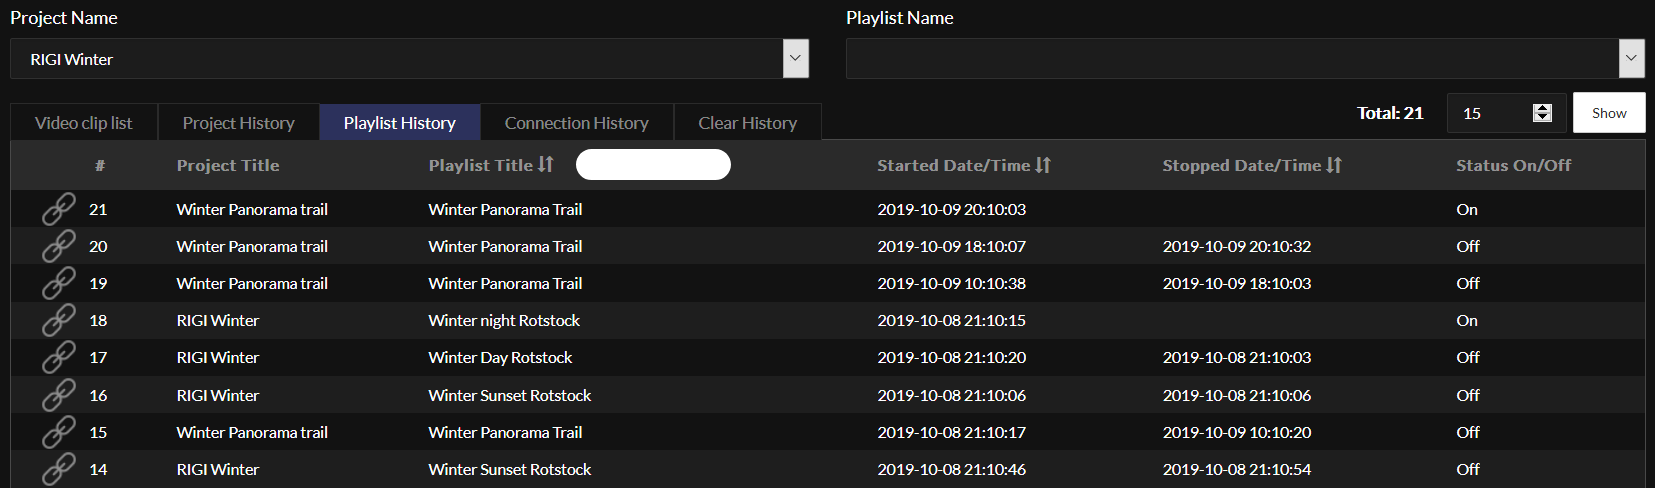
Monitoring
: Playlist history
Analog to the project history description you can monitor here the playlist history.
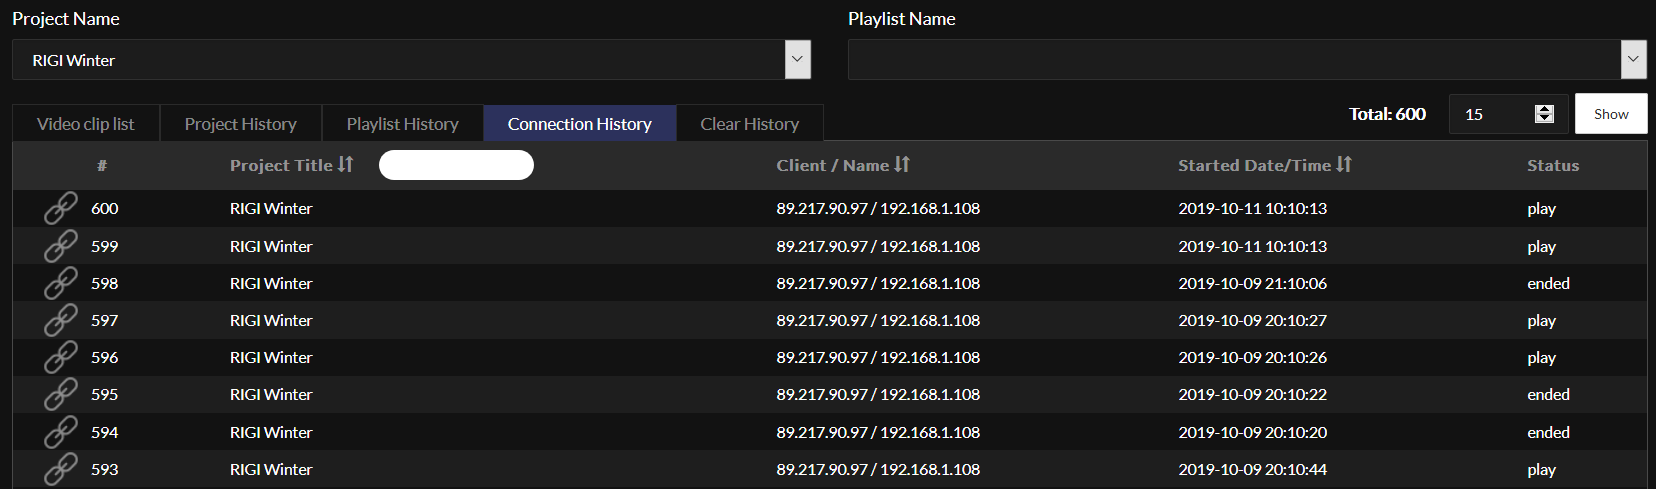
Connection history
Analog to the project history description you can monitor here the client (IP Address) history.
Ask us You did not find your required information? Contact us using our contact form or call us. We are reachable for you under the telephone number: +41 41 440 26 24


