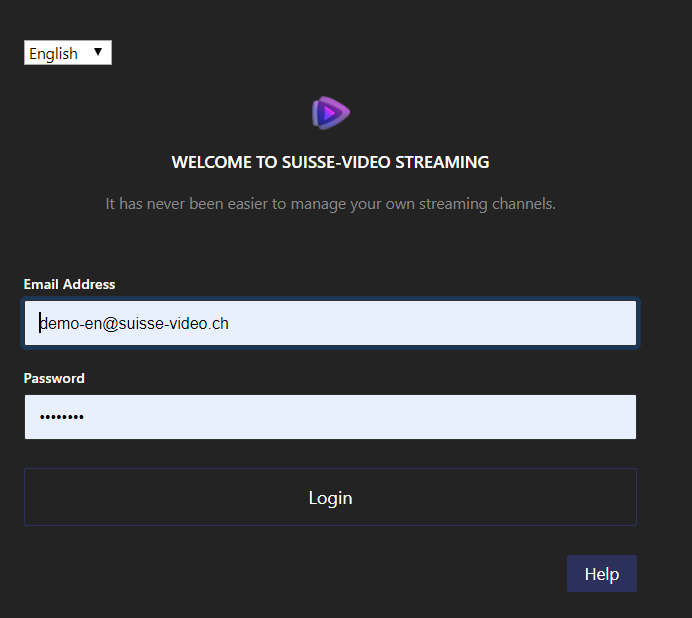
To use our streaming application you need to log in. If you don't have login details, please contact us at support@suisse-video.ch. If you already have login details, go to istream.suisse-video.ch and sign in.
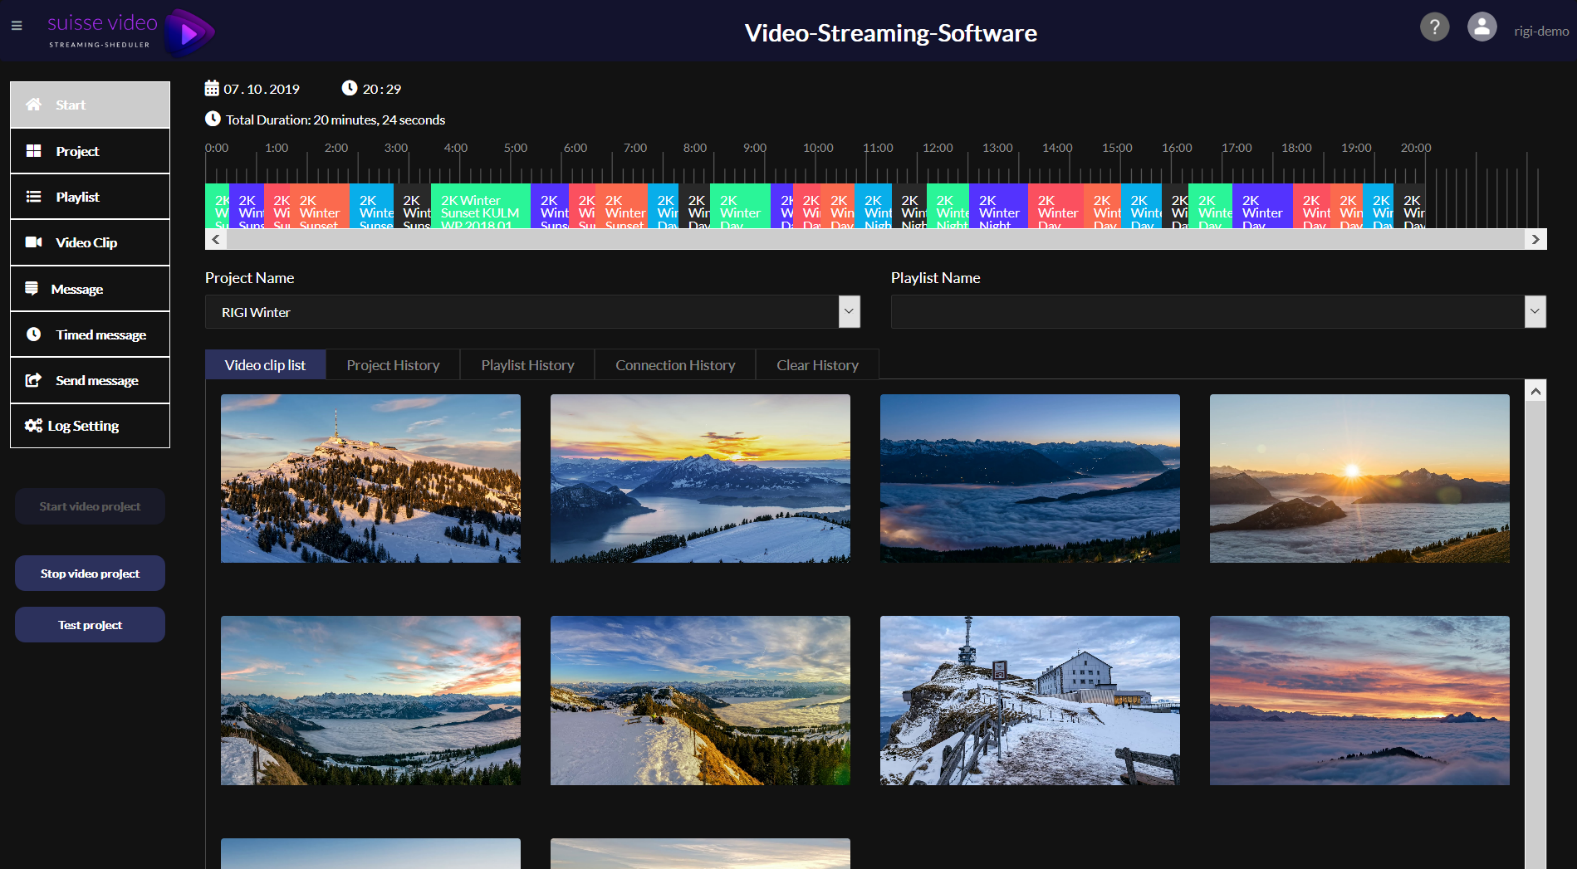
From here you can access every function of our streaming application:
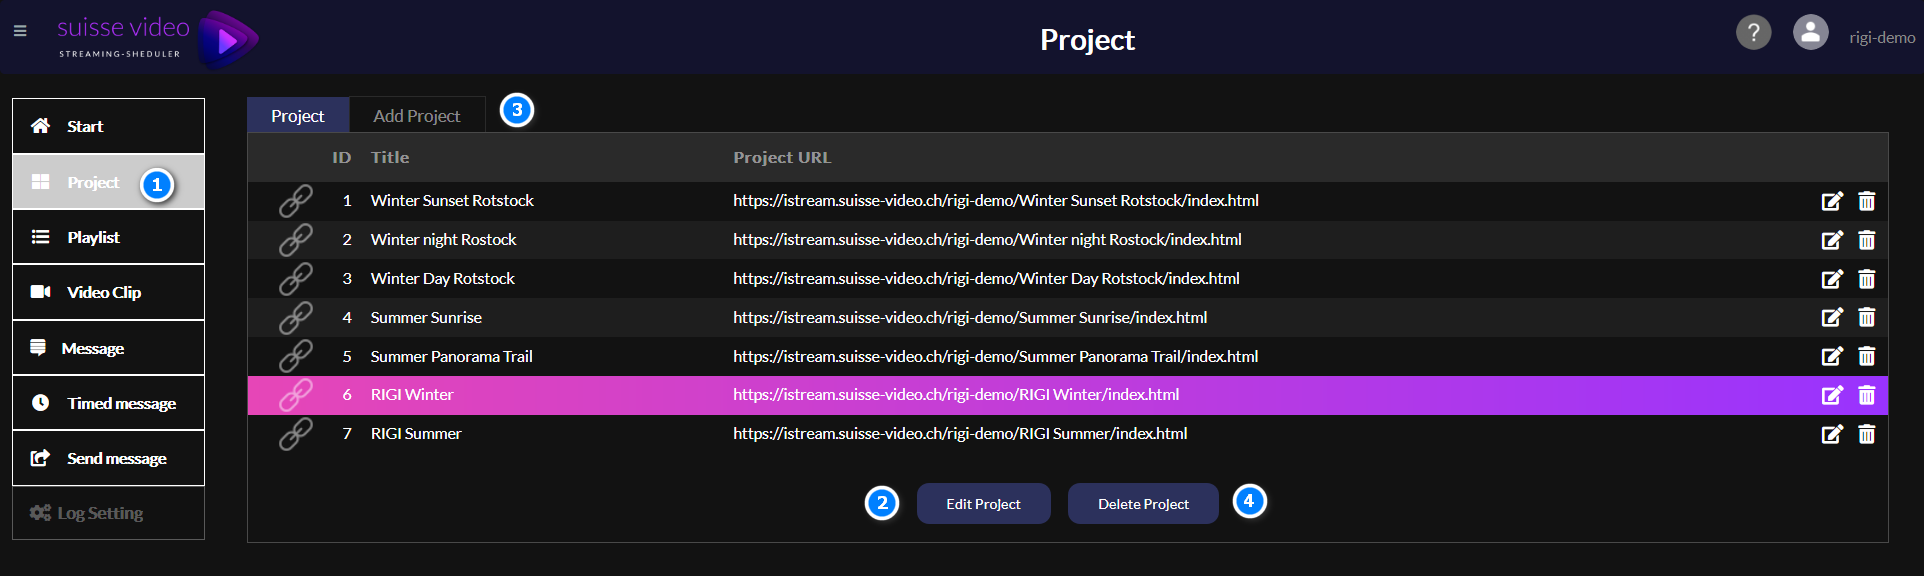
#1 Click here to open the project page · #2 Click here to edit existing project parameters · #3 To create a new project, click the "Add Project" tab · #4 Remove the selected project.
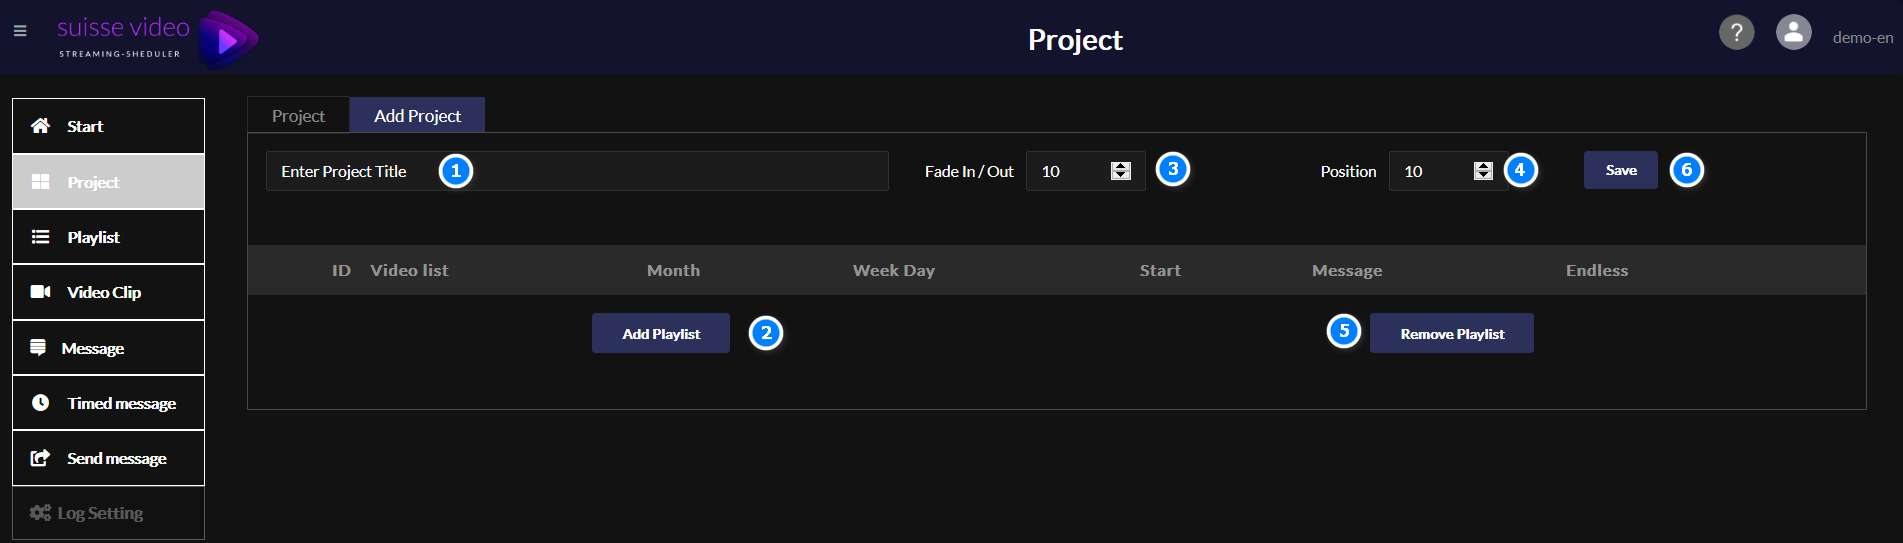
#1 Enter your project title here · #2 Add your predefined playlist to the project · #3 Use this fade in/out function to smooth the transition of your video clip · #4 Set the start position within your project clip · #5 Remove your project including all its settings.
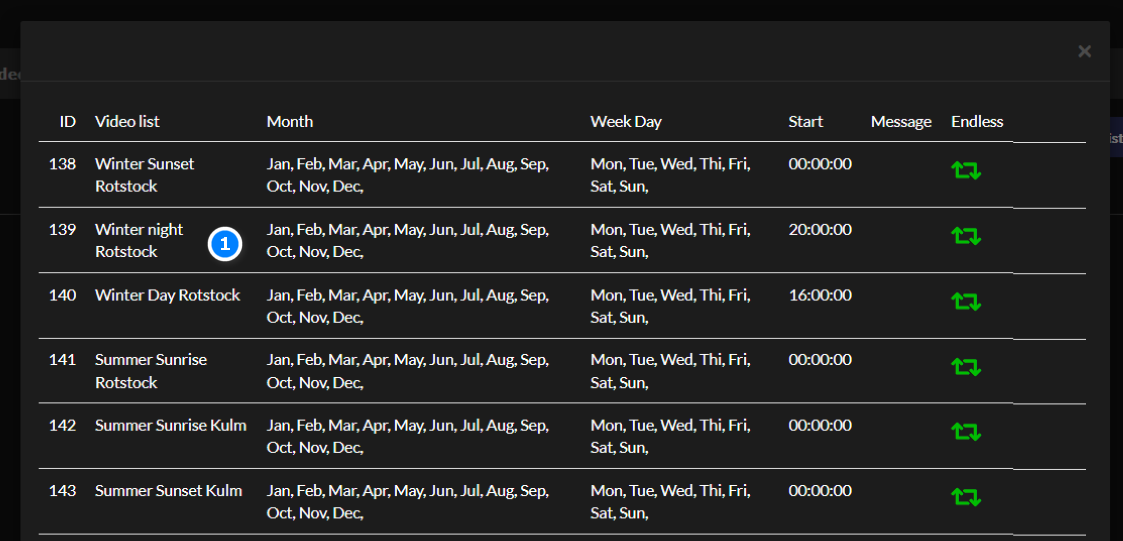
To add a playlist to your project, simply click one of the displayed playlists. It will be added to the preview of the selected project. Repeat this step for every other playlist you want to add.
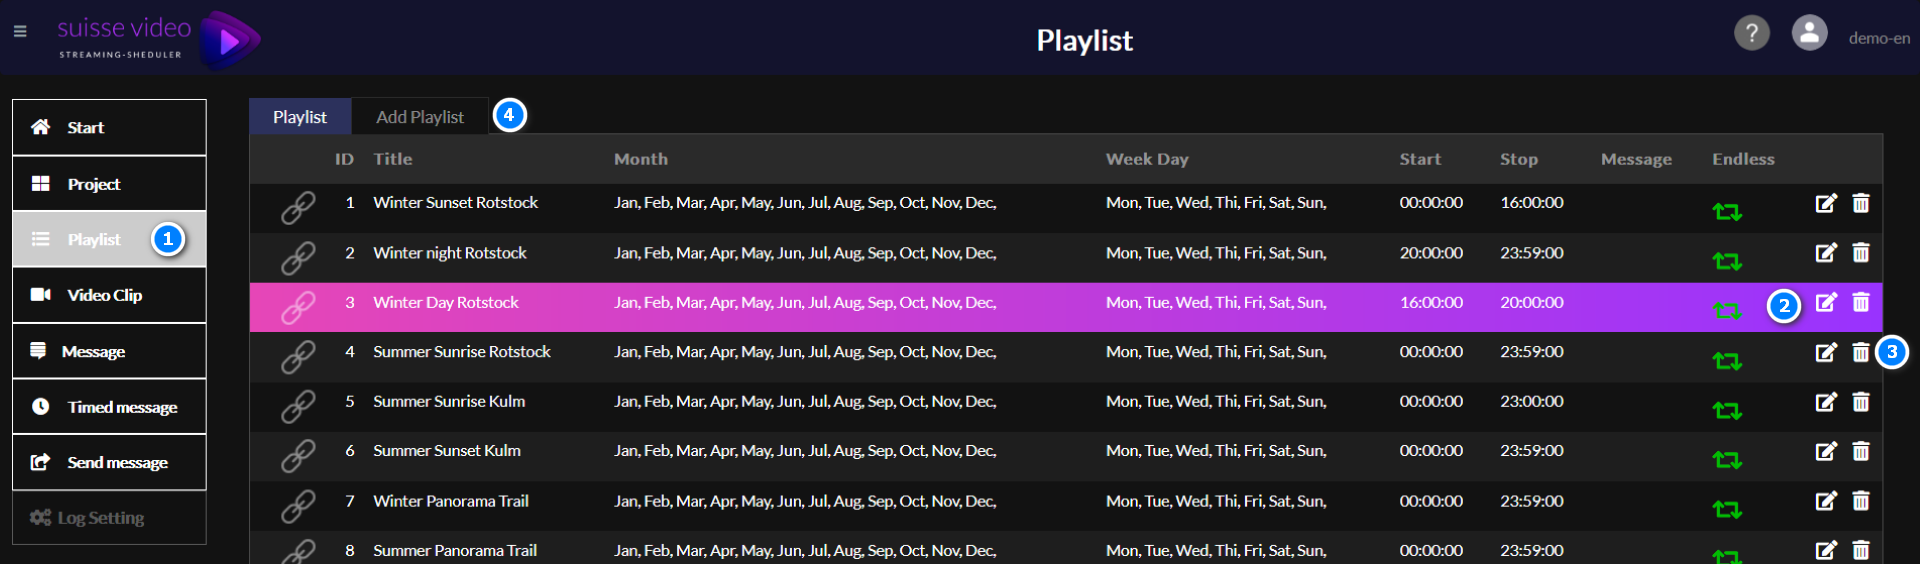
Here you can see every playlist you've created. From here you can create, edit and delete your playlists. #1 Click here to open the playlist page · #2 Click here to edit the existing playlist · #3 Remove the selected playlist · #4 To create a new playlist, click the "Add Playlist" tab.
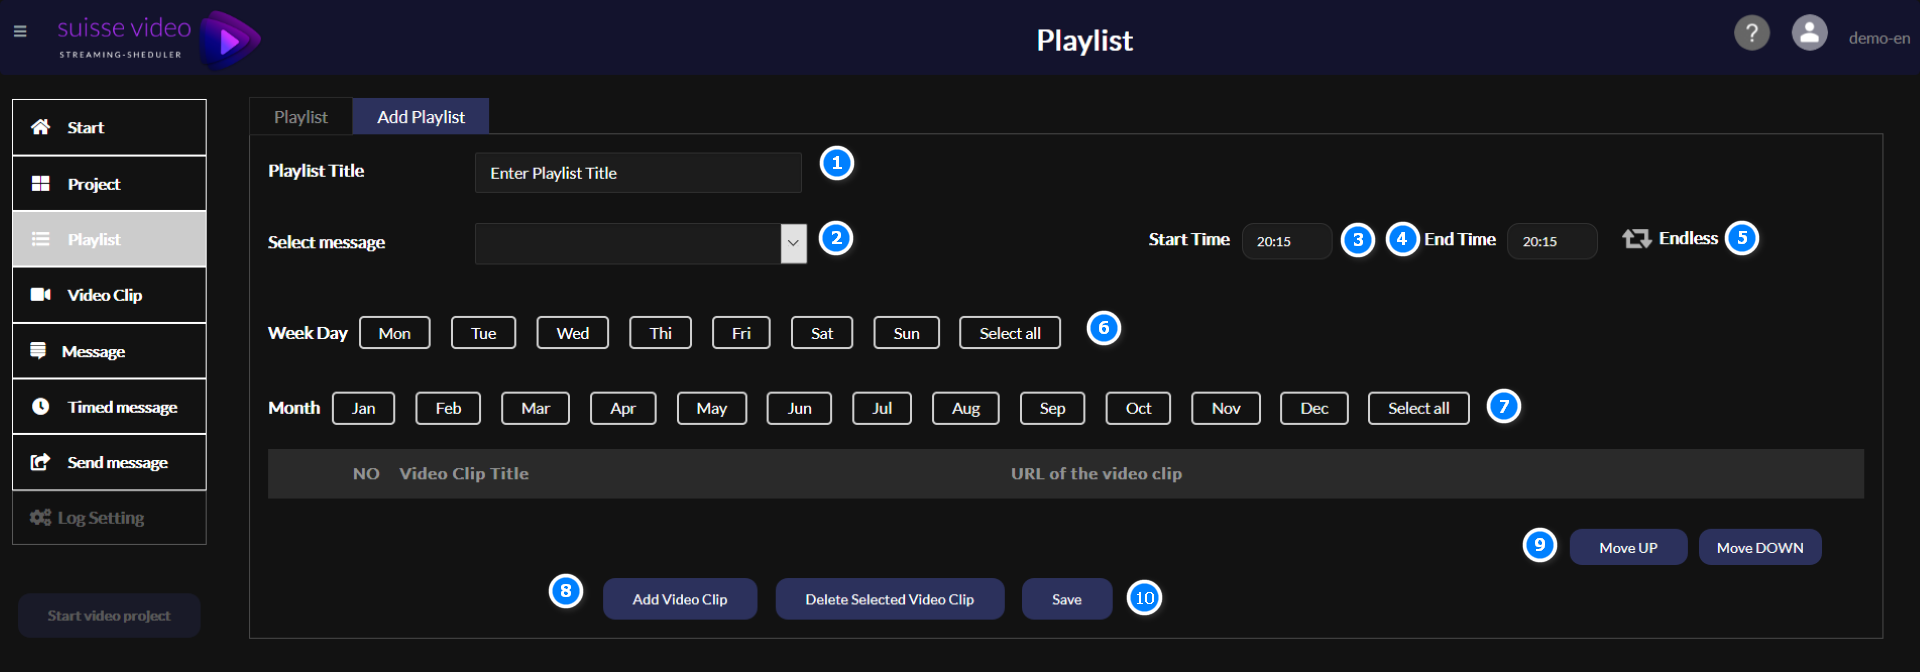
#1 Enter the name of the playlist · #2 Optionally add a scrolling message to your playlist · #3 Set the start time for your playlist · #4 Set the end time · #5 Set the play duration · #6 Set the play date · #7 Set the play month · #8 Add a video clip to your playlist · #9 Change the order of the clips · #10 Don't forget to save your changes!
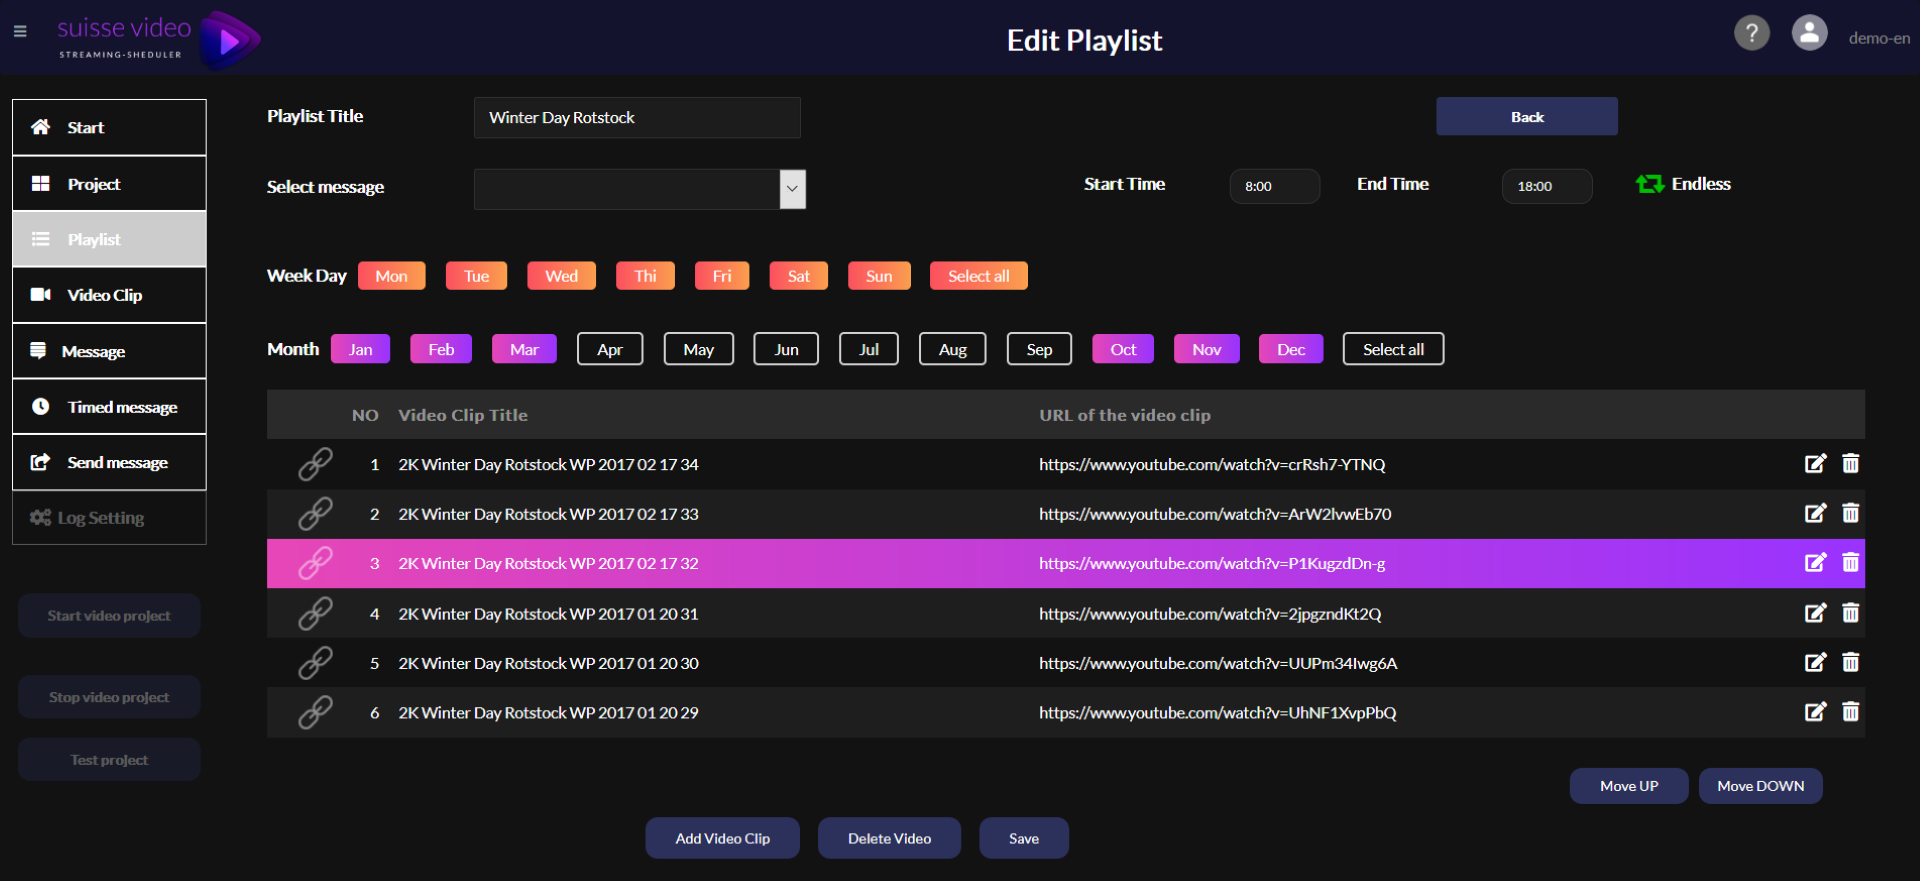
In this example you can see a selection for the whole week and the winter months.
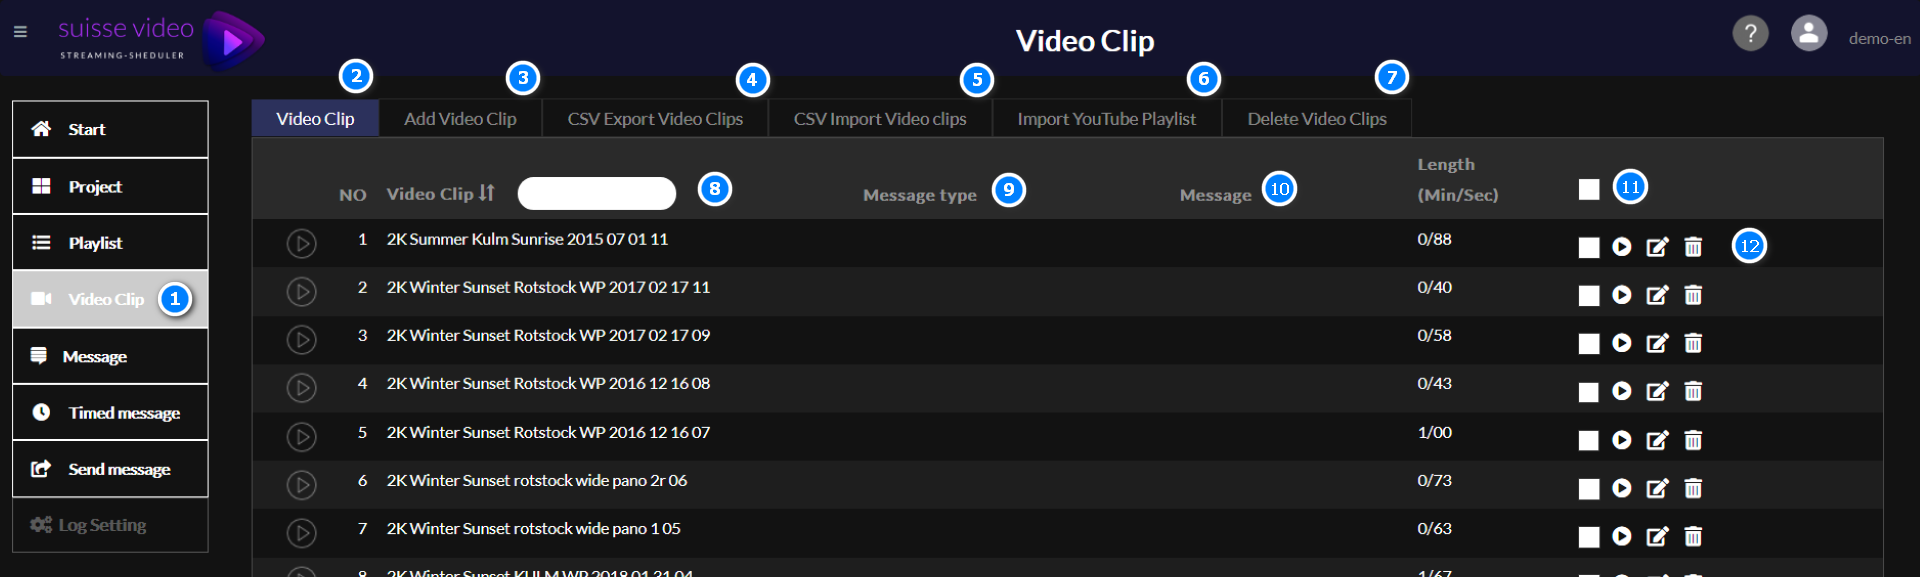
#1 Click here to open the video clip page · #2 Click here to view your imported video clip links · #3 Add a new single video clip · #4 Export your list to a CSV file — useful as a backup or to rename clips. Important: the file structure must not be changed, or the import will fail. · #5 Import a previously exported CSV file · #6 Import your YouTube playlists individually · #7 Remove all video links from your list · #8 Sort or filter by clip name · #9 Show the message type for a scrolling message · #10 Show the message content · #11 Select all video clips · #12 Preview, edit and remove the selected video clip.
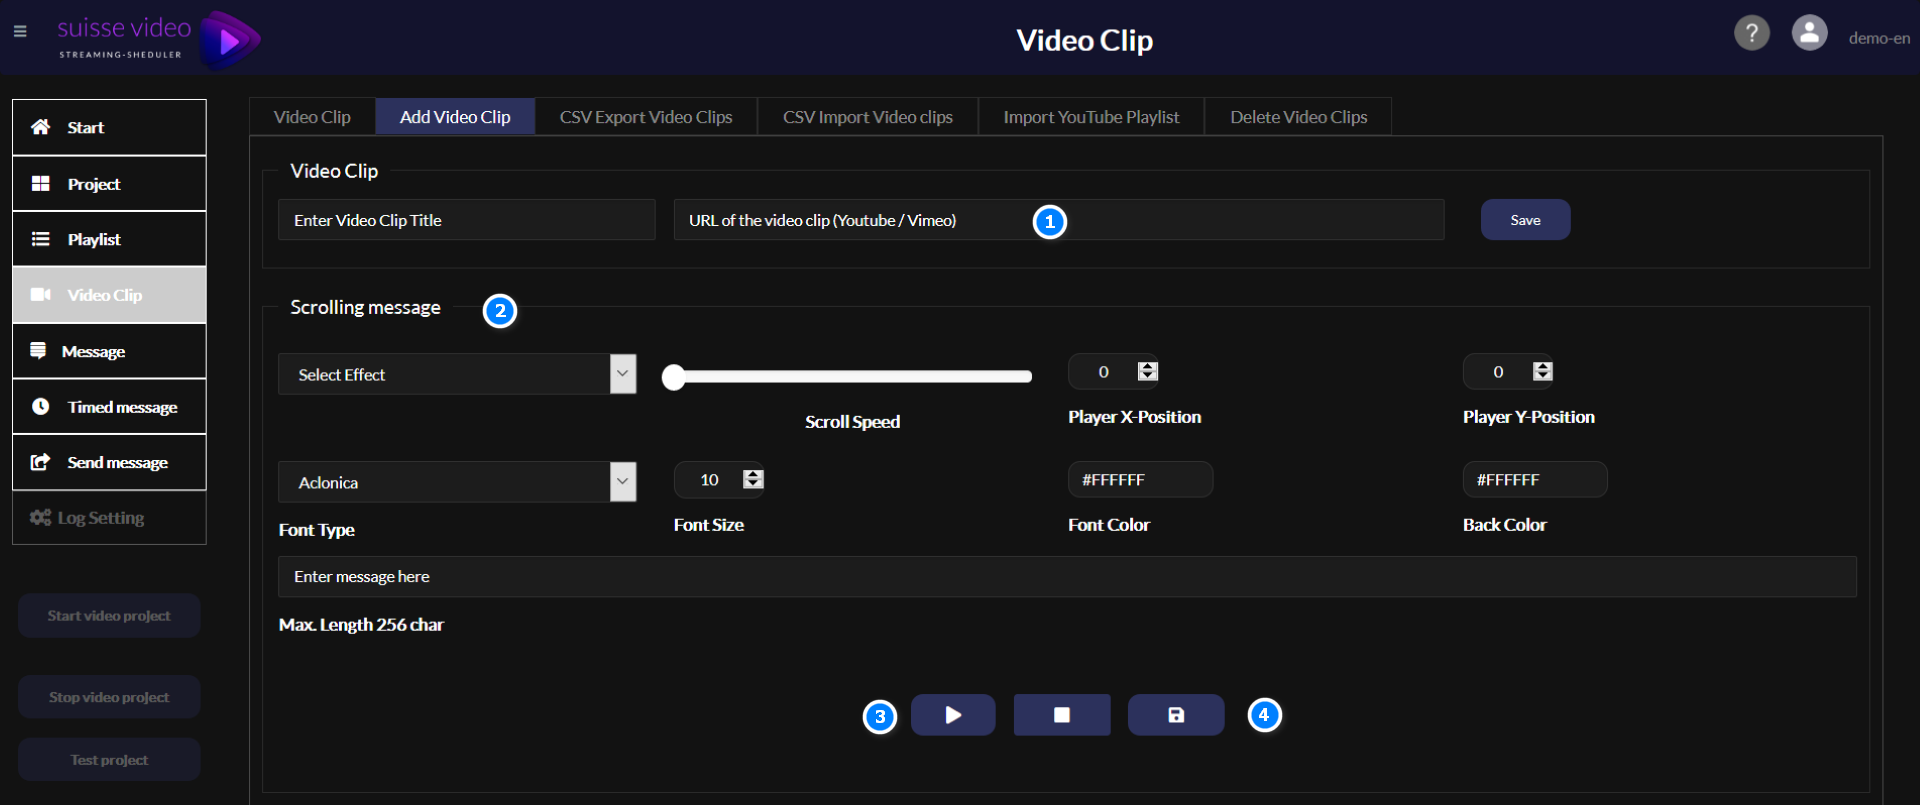
#1 Enter your clip URL here · #2 Optionally define a message for this video clip · #3 Preview your video clip · #4 Don't forget to save!

To export your video clips, use the "CSV Export Video Clips" button.

To import your video clips, click the "CSV Import Video Clips" button.

To delete your video clips, click the "Delete Video Clips" button.
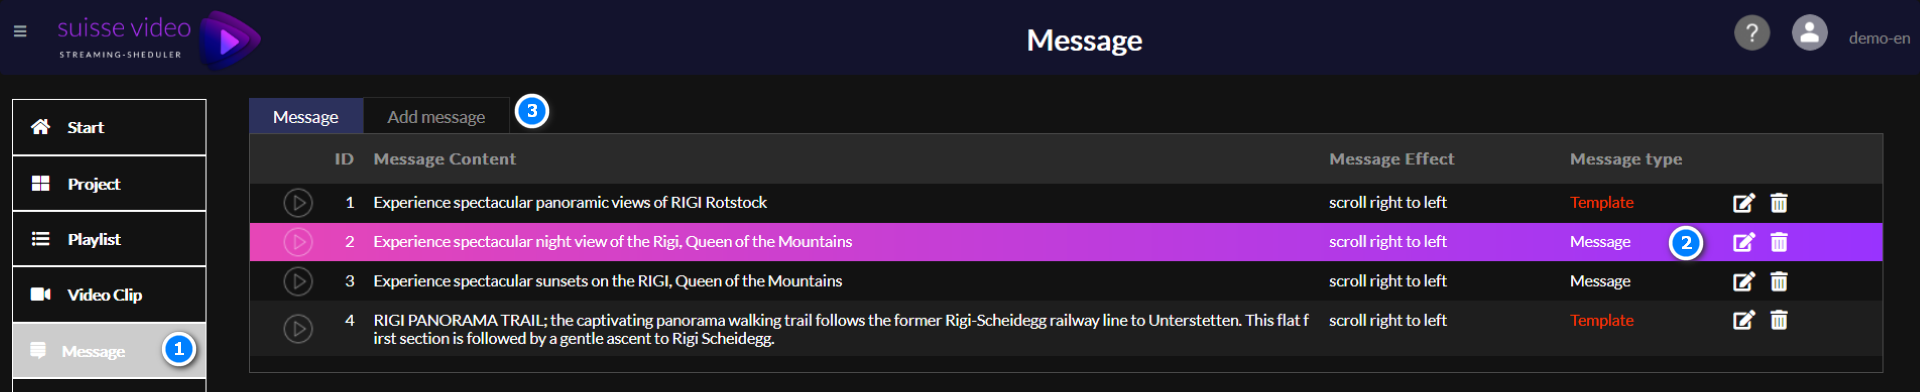
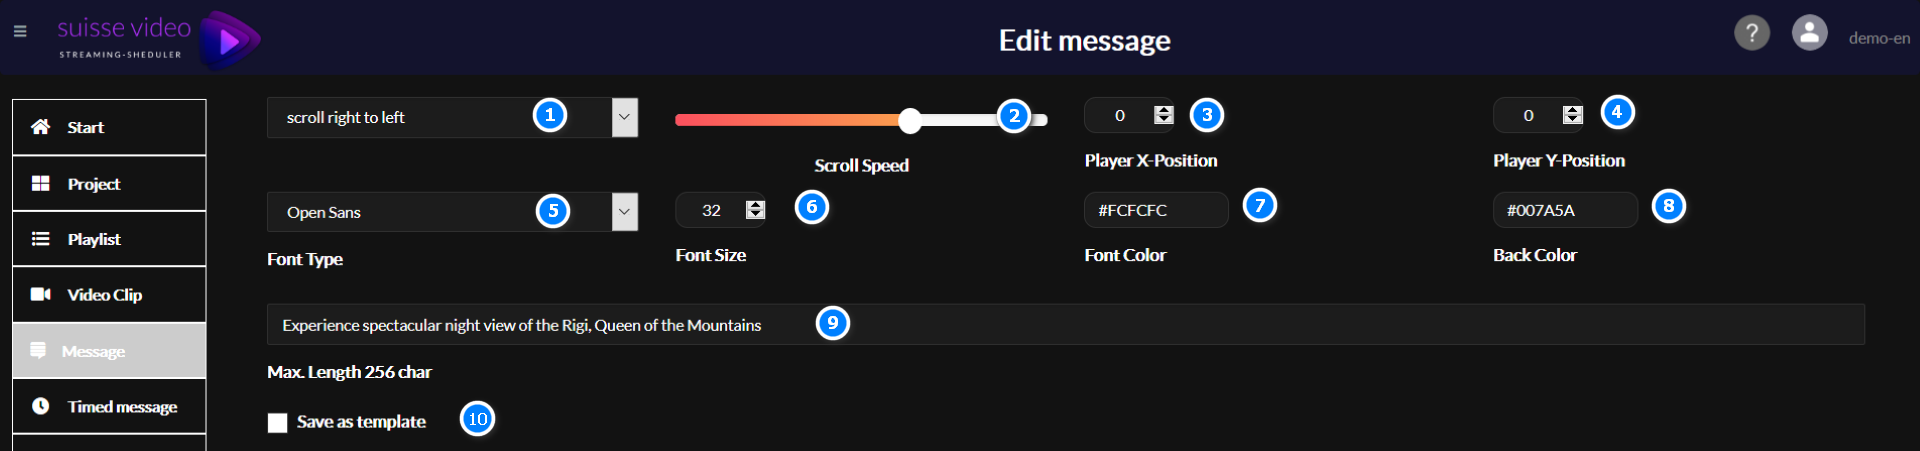
#1–2 Select scroll direction · #3 Adjust horizontal position (usually not required) · #4 Adjust vertical position (usually not required) · #5 Choose your message font style · #6 Choose the font size · #7 Define the font colour · #8 Define the background colour including transparency · #9 Enter your message text · #10 Save as a template to reuse later for your live messages.
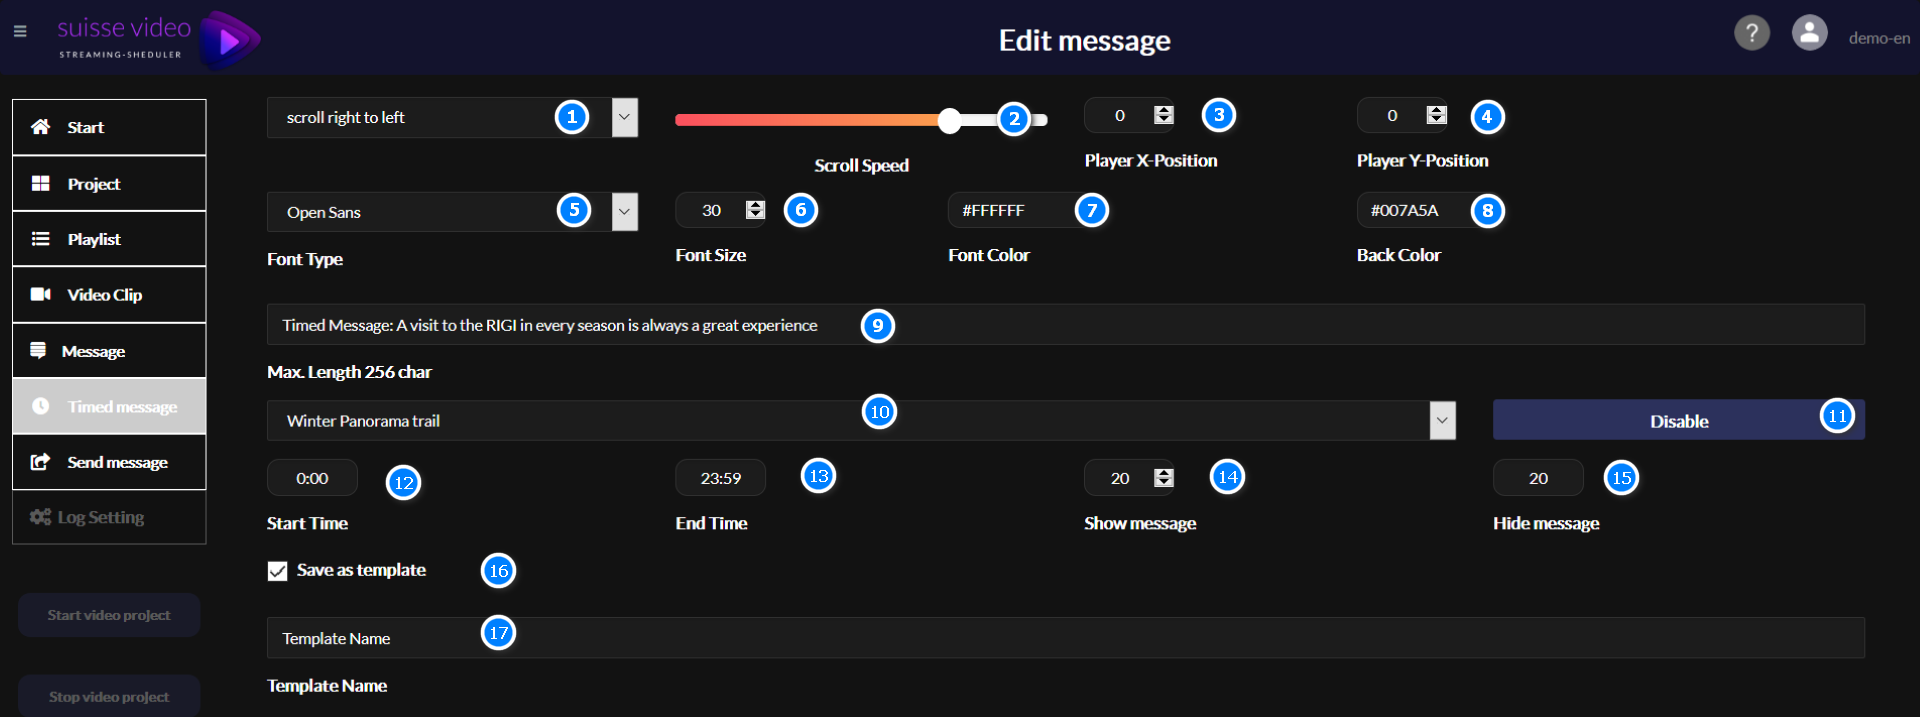
#1–2 Select scroll direction · #3–4 Adjust position · #5 Font style, #6 font size, #7 font colour · #8 Background colour including transparency · #9 Enter your message text · #10 Select the project this live message applies to · #11 Disable your active live message · #12 Enter the start time · #13 Enter the end time · #14–15 Set the fade in/out time in seconds for an alternating message · #16 Save as a template · #17 Give the template a name.
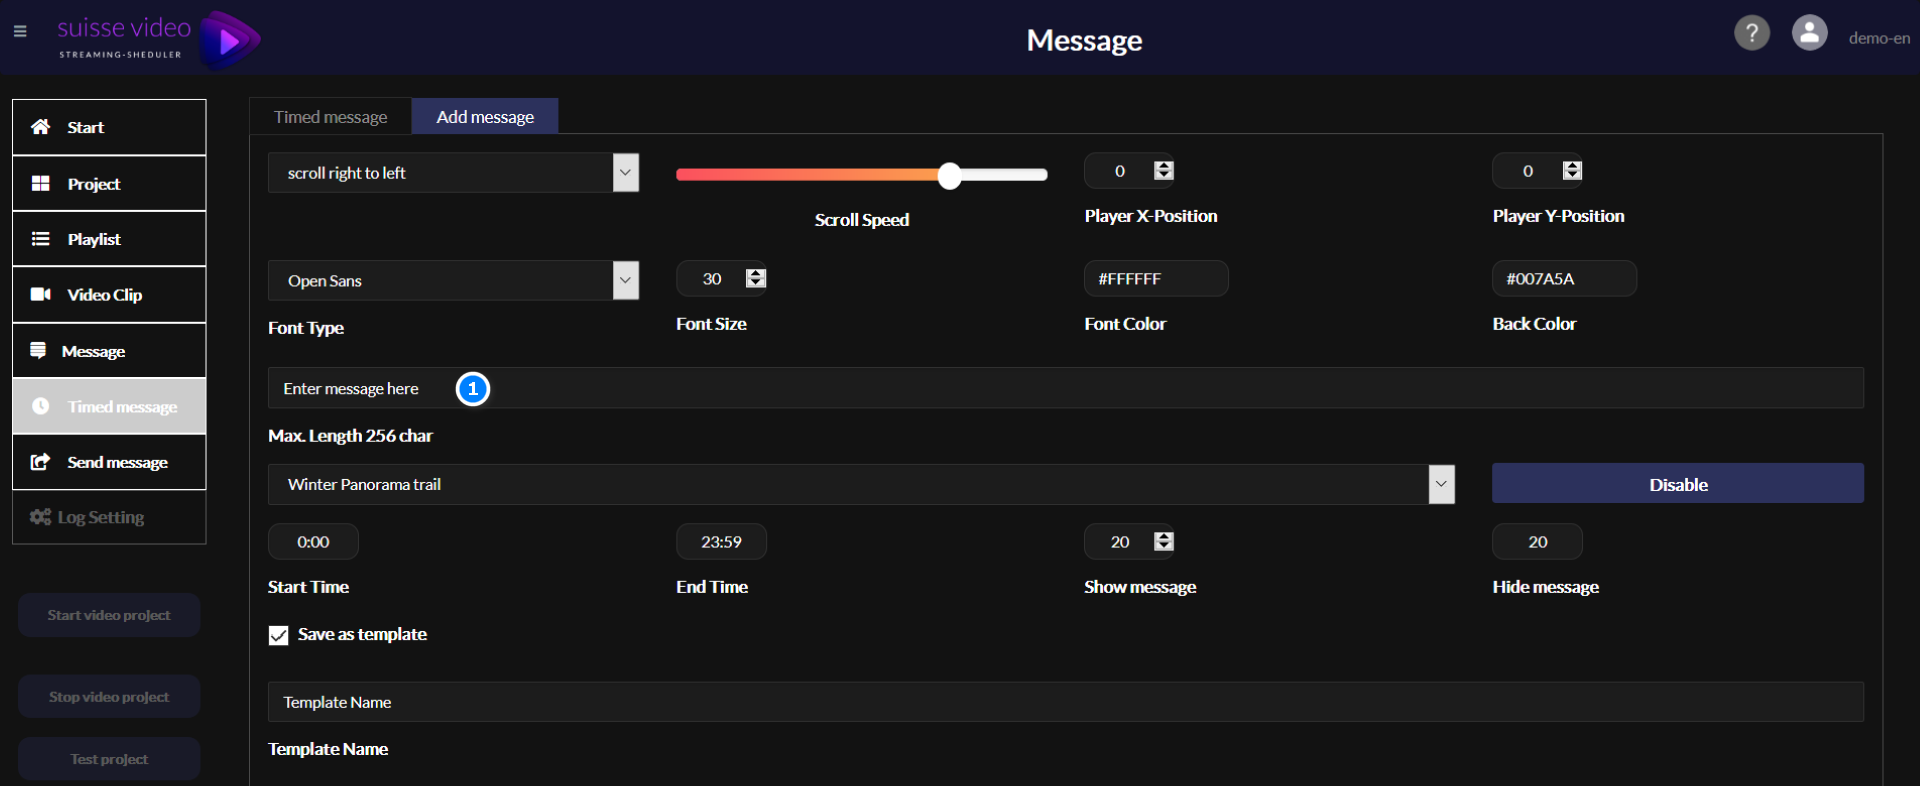
Enter your message text and set every other parameter as in the example above.
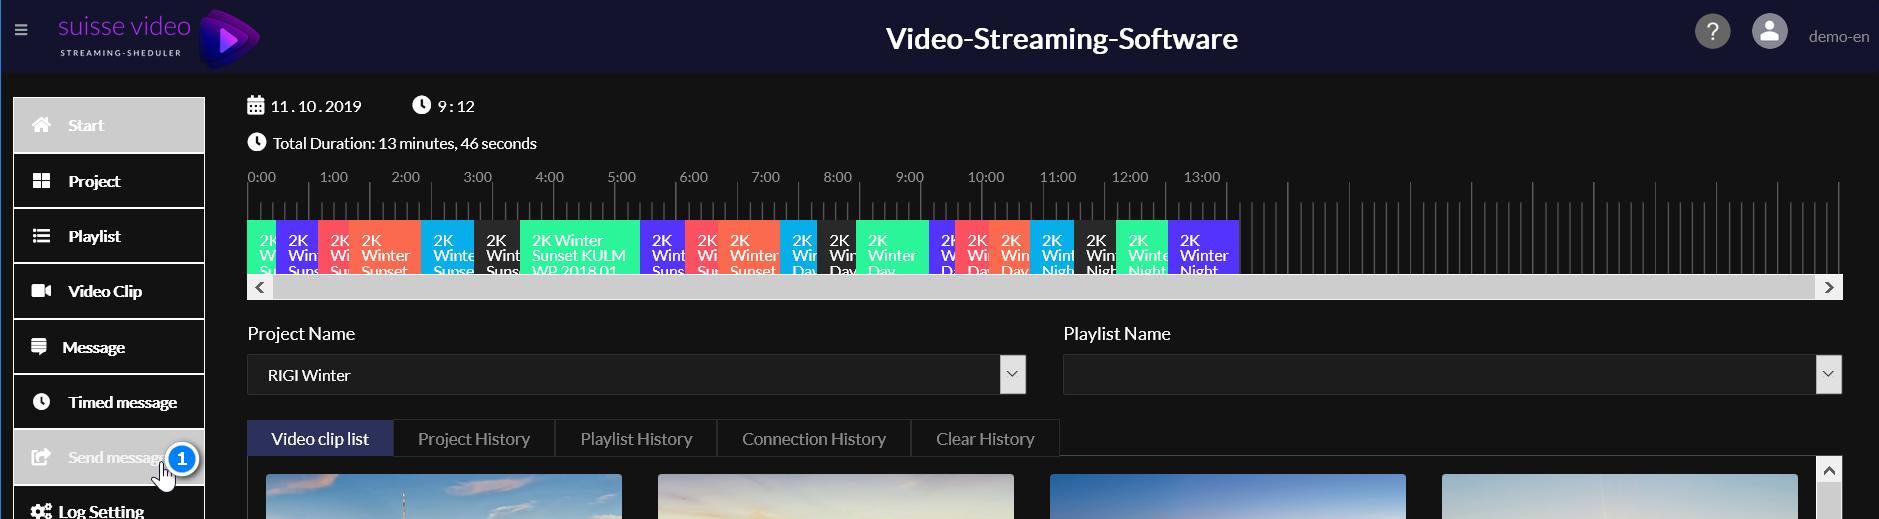
#1 Click here to open the message dialog.
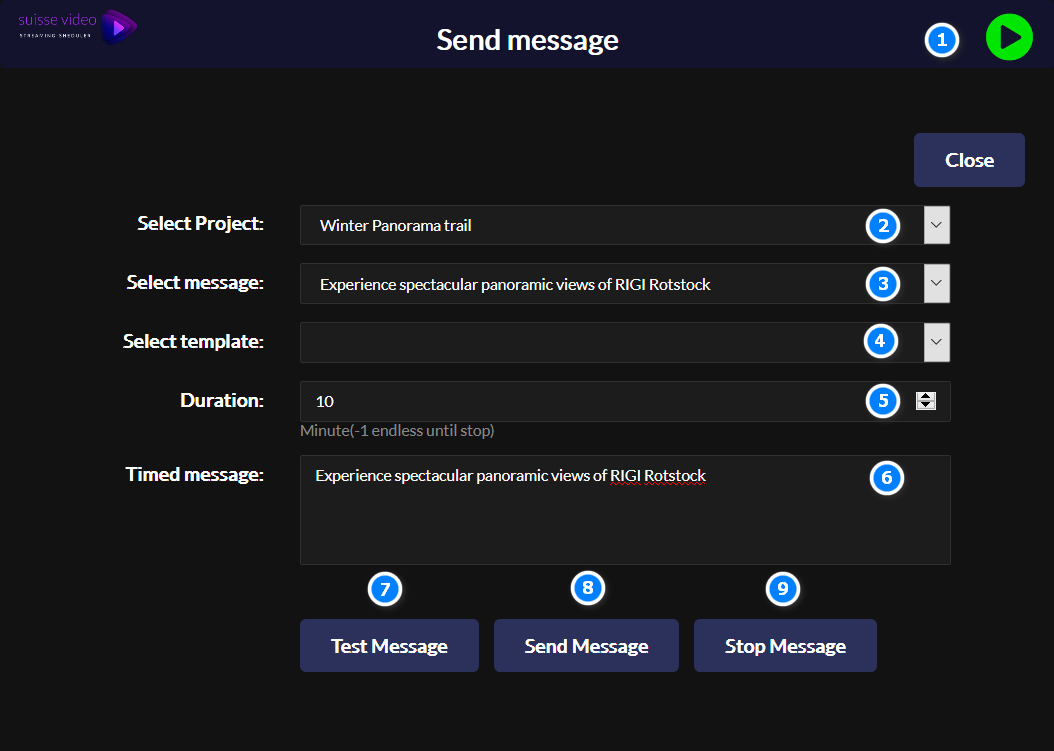
#1 A green light shows the selected project is active · #2 Select a project to send a live message to · #3 Select a saved message to send (not needed if using a template) · #4 Select a template (not needed with defined messages) · #5 Set the message duration (−1 means the message stays until manually stopped) · #6 Enter or edit the message content · #7 Test message in a separate window · #8 Send the message to the selected project · #9 Stop the active message on the selected project.
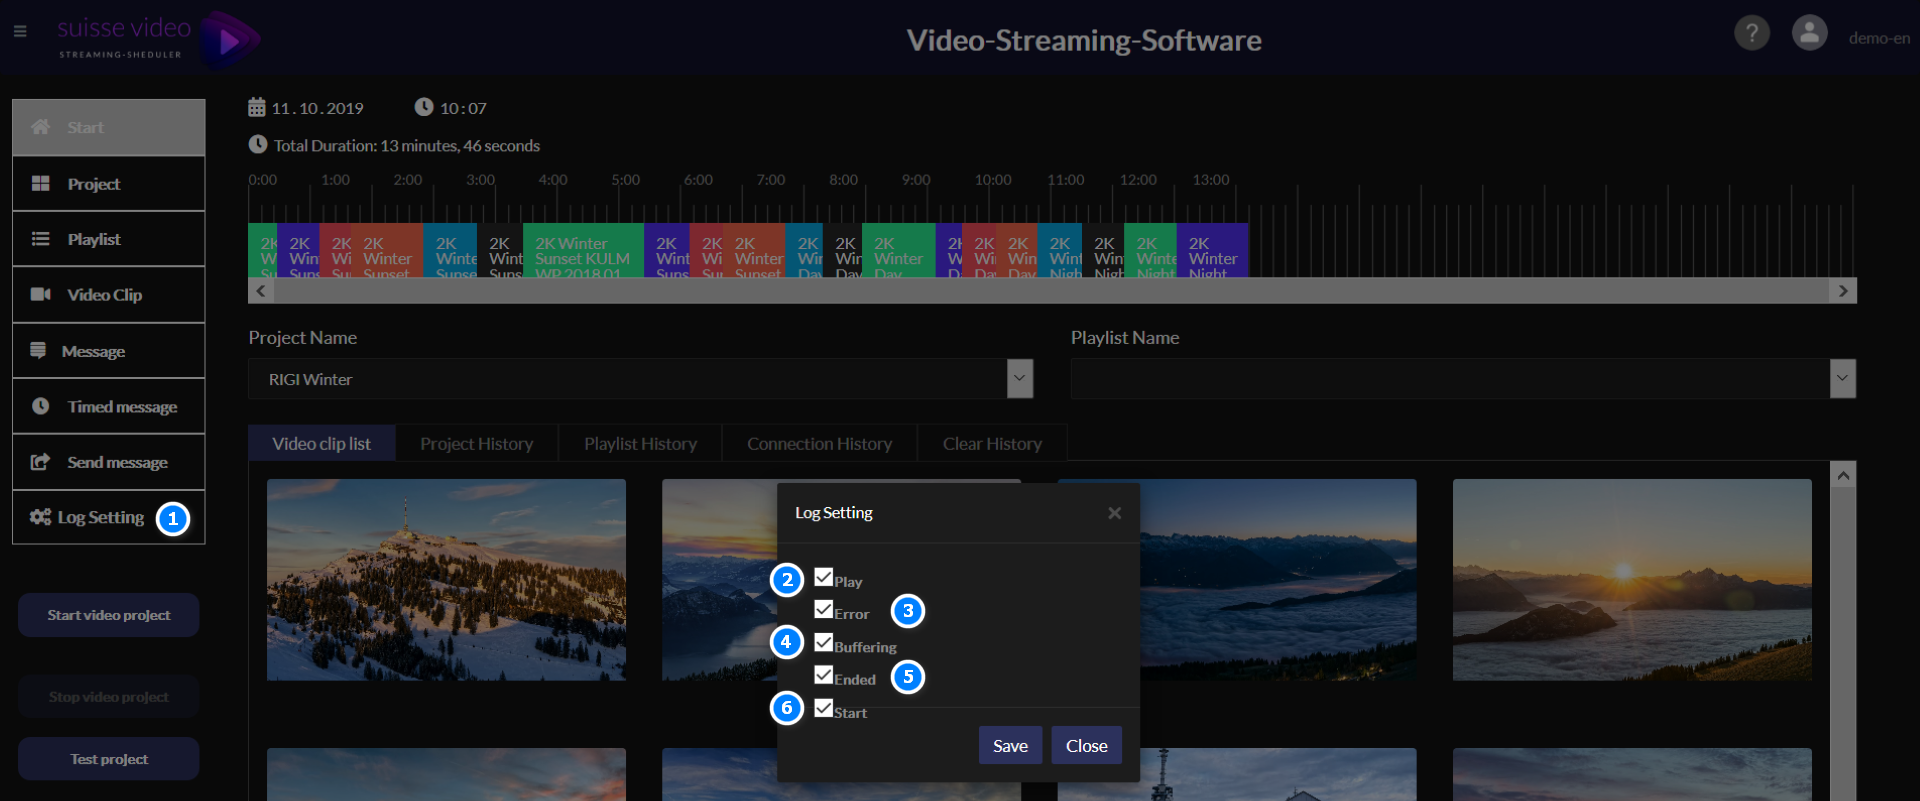
#4 Monitor the buffer status of the connected client player · #5 Monitor the end status · #6 Monitor the start status. These parameters help with troubleshooting — you usually don't need to enable them all.
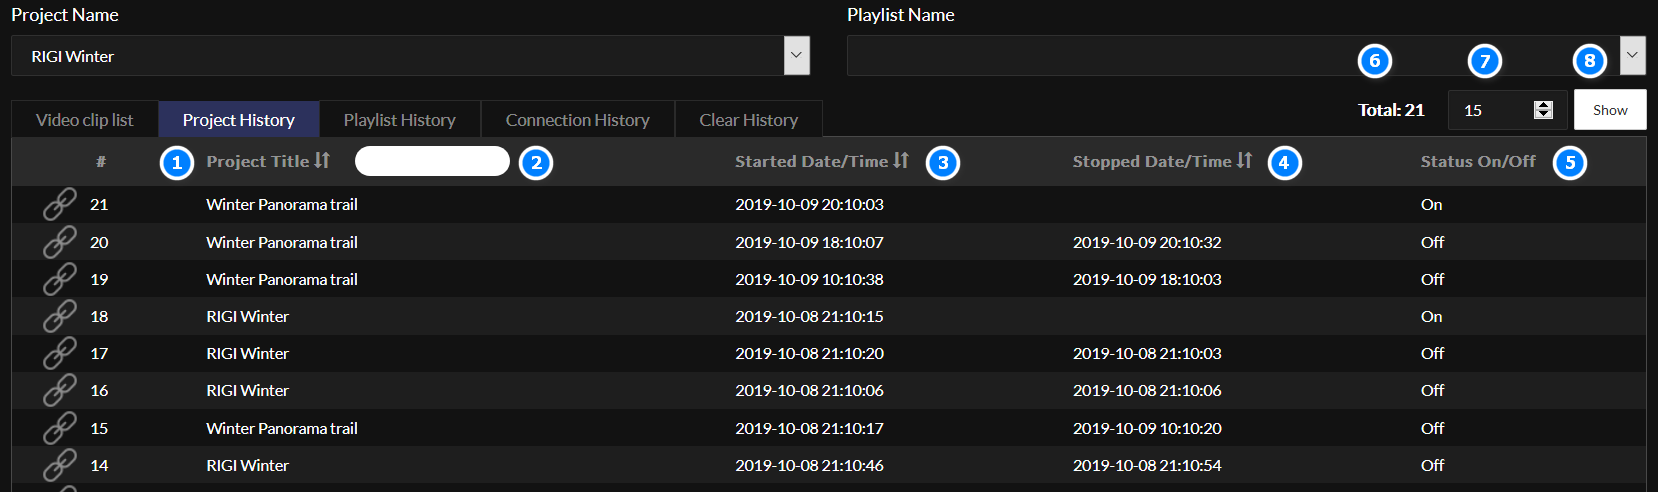
#1 Sort this list by project name · #2 Enter a project name to filter · #3 Sort by start date/time · #4 Sort by stop date/time · #5 Sort by on/off status · #6 Total number of records for the selected project · #7 Choose the range of records shown · #8 Refresh the list contents.
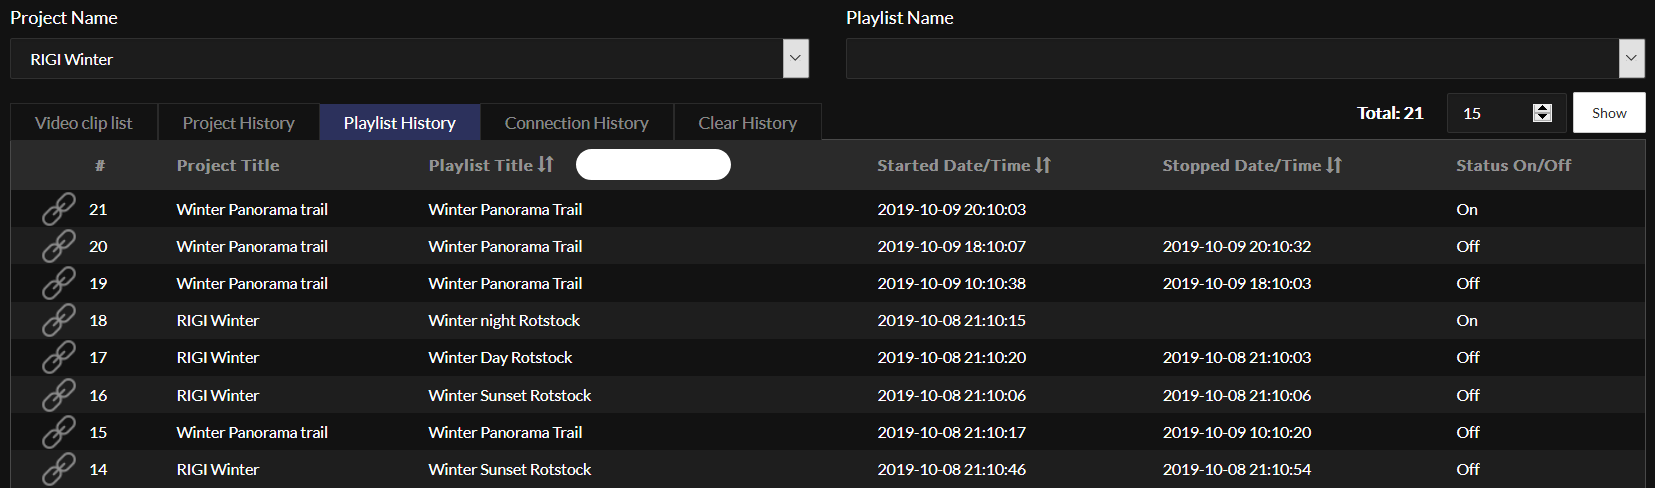
Just like the project history, you can monitor playlist history here.
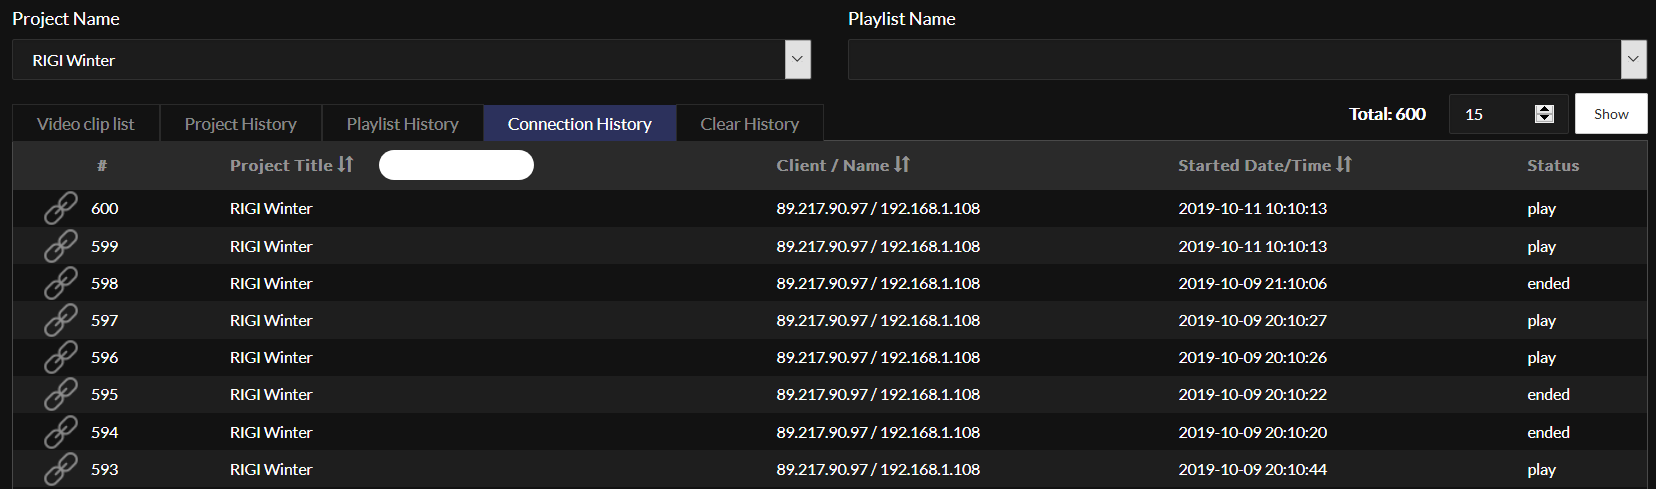
Just like the project history, you can monitor client history (IP address) here.
Didn't find what you need? Contact us using our contact form or call us.
