← Back to the overview article
How to keep digital menus up to date: a workflow for kitchen and front-of-house staff
Decide who reports menu changes, who edits the content and who checks the screen. A short, agreed process is enough to get started, even in a small team.
1. Assign responsibility and arrange cover
For each shift, name the person who receives and enters menu changes, plus someone to cover for them. The kitchen confirms which dishes are available. The person making changes needs access to the relevant menu content; arrange this through your existing account setup. This workflow does not depend on special software roles or approval features.
2. Report changes with all the necessary details
Agree on one way to report changes, such as a short message or a note at a designated workstation. Include the menu, dish, requested change and how long it applies. For a replacement dish, include the confirmed price and description. For price changes, make clear who has approved the new price.
Example menu-change message
Menu: today’s lunch menu
Change: remove penne with vegetables — sold out
Applies to: today’s lunch service only
Next: check the screen and inform front-of-house staff
3. Edit the correct menu
Open the relevant menu in SUISSE-VIDEO’s “Text content” editor. Check the day and meal before editing. Remove the sold-out dish or add a confirmed replacement. If the dish appears on several menus, check each affected menu individually. Save your changes using the editor’s save function.
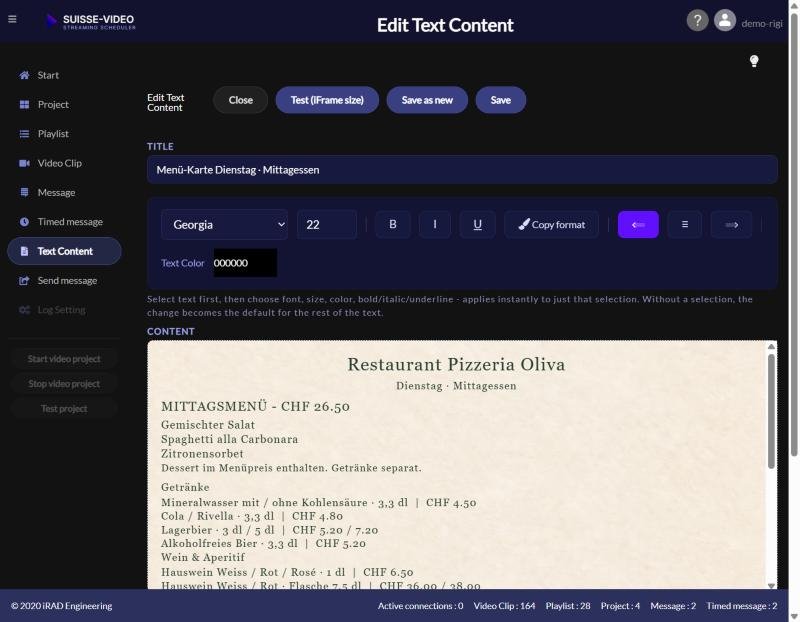
4. Check what guests actually see
Do not rely on the editor alone. Check the restaurant screen: has the dish been updated, and are the price, description and side dishes correct? If the old version still appears, check that you edited and saved the correct menu and that it is assigned to the project being displayed. Then check playback again. This guide does not assume a fixed time for updates to reach the screen.
5. Let front-of-house staff know
Tell the team once you have checked the updated menu on screen. If guests have already seen or ordered the previous offer, staff still need to explain the change directly. Updating the screen does not replace that conversation.
6. Keep a record of temporary changes
Note the date, affected menu, change and next check. For example: “Penne removed from today’s lunch menu; confirm availability with the kitchen before the next lunch service.” Do not restore the old entry without checking that the dish is available again.
7. Check the menu before each service
Compare the menu on screen with the dishes the kitchen has confirmed. Check dishes, prices, side dishes and display times. When introducing a new weekly menu, also check the weekday assignments. Clear names such as “Monday – lunch” make the correct version easier to find.
What this process is intended to achieve
Your menu should show what guests can actually order. Notice whether guests still ask for unavailable dishes and where updates get delayed. Use those observations to improve the process. This workflow does not set up automatic stock tracking or a connection to your till.
Checklist for a menu change
Related: Make your daily specials easy to read · Schedule lunch and dinner menus