← Back to the overview article
Schedule calendar for text cards: set it up step by step
A card with a menu, notice or message only appears on the screen when an event is entered for it. This guide shows how to create events, set lunch and dinner times in one go and check your plan in advance.
1. Prepare the card
Create the card under Text content (title, text, background) or add it later directly in the Event dialog with “+ Create new card”. A card newly added to the project has no event at first and therefore does not run yet.
2. Open the schedule calendar
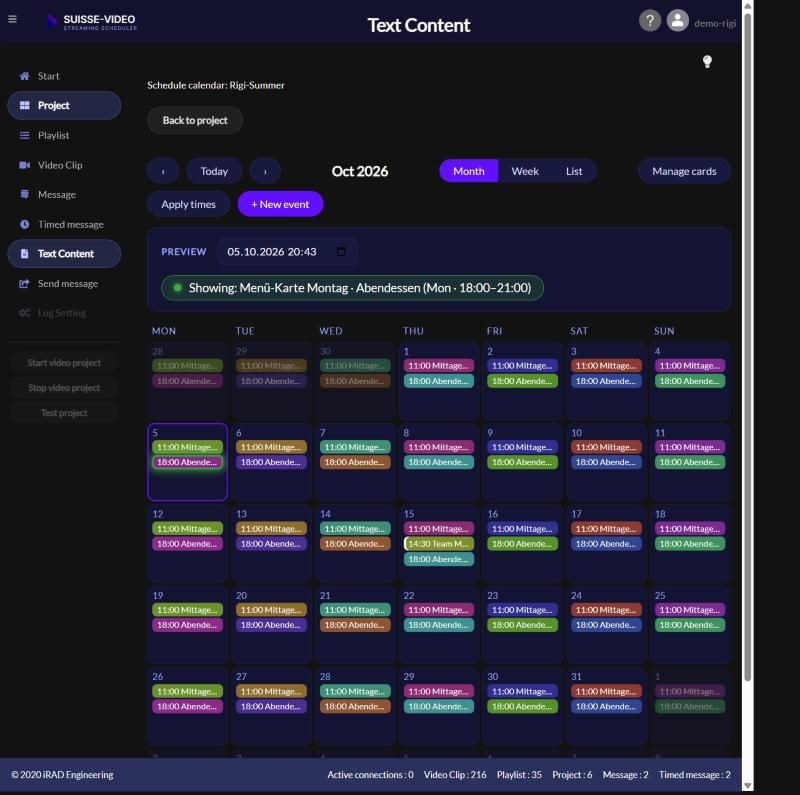
Open Schedule calendar on the Edit project page or click the calendar icon of a card. Month, Week and List change the view, the arrows move forward and back, Today jumps to the current day.
3. Create an event
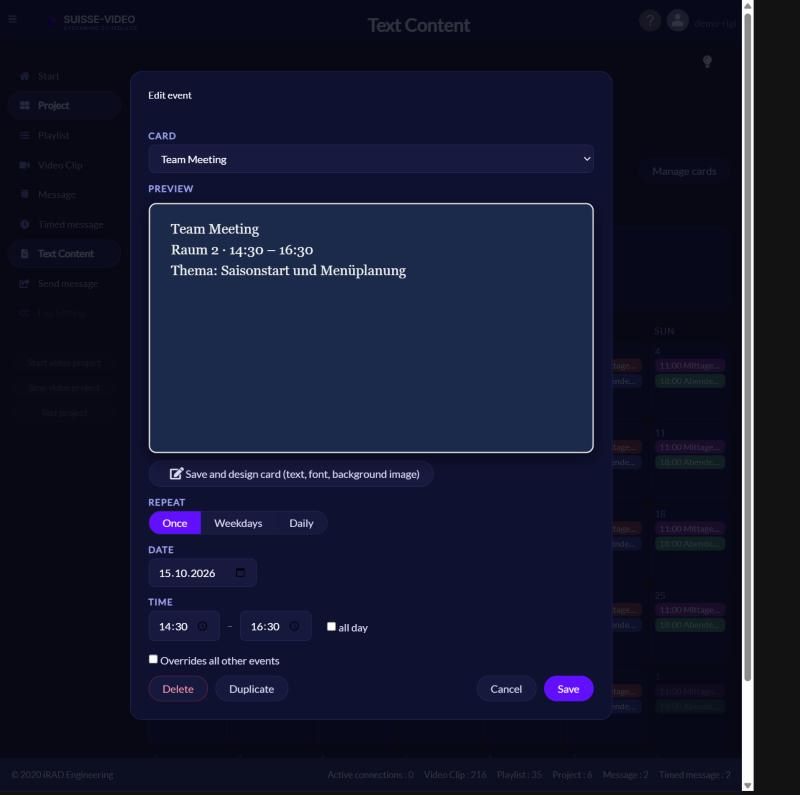
Click “+ New event” or click directly on a day. In week view you can drag a time range with the mouse, for example 14:30 to 16:30; the dialog then opens with date and time. Choose the card. The preview shows it the way it will appear on the screen.
4. Choose the repeat
“Once” applies to a specific date, for example a conference. “Weekdays” repeats the event every week on the chosen days, “Daily” every day. For both you can set “Valid from” and “Valid until”, for example for a Christmas menu from 1 to 24 December. “Only in these months” limits the event to certain months, for example a winter menu from November to February. If the field is empty, the event applies in all months.
5. Set the time
Enter start and end under “Time”. With “all day” the card runs the whole day. The start must be before the end.
6. Decide which event wins
If events overlap, the most specific one wins: first “Overrides all other events”, then single-date event, period, event with months and finally the weekly rhythm. On a tie the shorter event wins, then the newer one. Use “Overrides all other events” only where an event really should push everything else aside.
7. Apply lunch and dinner times in one go
If meal times repeat, click “Apply times” in the calendar, enter lunch and dinner from/to and choose “Apply to all cards”. Cards with “lunch” in the title get the lunch times, cards with “dinner” the dinner times – on all their weekly and daily events. Single-date events stay unchanged.
8. Check the plan
Pick a date and time in the “Preview” field. Next to it you see which card would run then; it lights up green when a card runs. If none does, it says the playlist runs. The entry that is active right now pulses green in the calendar. Also check the card itself with the eye icon.
What the calendar does not do
The calendar only decides when a card appears. You maintain texts, prices and times in the card yourself; no automatic connection to a till or reservation system is set up. If opening hours change, adjust the events.
Checklist for a new event
Related: Who keeps your digital menu up to date? · How to schedule lunch and dinner menus on your restaurant screen
Keep reading: From breakfast to dinner: plan your restaurant screen · Promote hotel events on your screen